Many thanks to SWLing Post contributor, Georges (F6DFZ), who writes:
After the first information from your wonderful website, I immediately ordered the XHDATA D-808 receiver from Aliexpress for €62 including shipment to France.
I got it very quickly, shipped from Amazon UK!
I did a few tests on SSB. MDS is outstanding, the minimum signal from my HP generator at -127 dBm (0,1uV), is strong even on 28 MHz. Selectivity is also good, and the opposite sideband rejection is audibly also good. However I was unable to measure it because the S meter give the same indication over a few kHz around the signal of the generator. I suspect the opposite sideband rejection to be done by the DSP chip at AF, but I cannot confirm this.
Reception is very good on FM, and the AF from the loudspeaker is reasonable. On headphones, it’s very good. RDS works as it should and sets the clock of the receiver.
I did only a few minutes test on LW and MW, and it seemed OK, even if I don’t have a lot of experience on these bands.
SW AM listening was very good; good audio, great selectivity. I suspect that the bandwidths given are AF bandwidths as even the most selective were not too much muffled. If it was IF selectivity, the AF bandwidths would have been half the values and much muffled.
SSB and CW reception are also very good even if the DSP chip has a long attack time and hence gives distortion during the beginning of each message.
About SSB: I think that this receiver is better than the [Tecsun] PL-880 and comparable to the PL-660.
Reception is good on the short but sturdy telescopic antenna.
If you connect the receiver to a large external antenna, you will encounter many IMD signals. As there is no built-in attenuator, you will need an external one.
The manual is correct, but very short about the memories.
ATS logs its findings into the first pages, so if you want to keep some memories, log them a few pages away.
The available pages are different with bands, FM has its pages, SW its pages etc…
Unfortunately, memories don’t keep the mode on SW–only the frequency and selectivity. After calling a memory, you will have to choose between AM, USB and LSB.
I was totally unable to light the “Preset” label on the display ?!?
Display and backlighting are very nice.
Somewhat odd, but the squelch seems to work sometimes on other bands than Air band !
Ergonomics are reasonable, quality of construction is good for the price.
Overall, for the price, this receiver is quite outstanding.
Best regards from France .
Georges F6DFZ
Thank you, Georges! Excellent thoughts on the D-808. Your note about squelch control working outside the AIR band reflects what the Digitech AR-1780 does as well–hinting that firmware is very similar.
I fully suspect the D-808 is on the path to being one of the best radio values under $100 US.
Many thanks to SWLing Post contributor, Dean Denton–our intrepid 13 year old DXer–who seeks a little input from the community. Dean writes:
I am going on holiday in July this year, to Fuerteventura in Islas Canarias, near west Africa.
This will be the first time I will be going on holiday, you will probably know the feeling. Because I am a hardcore radio-fan, I will of course bring my Tecsun PL-660, and I will be posting clips on my YouTube Channel, EuropeDX.
Please could you give me, some vital tips when going on holiday when DXing?
The Canary Islands are in close proximity to North West Africa, so I will be DXing: Morocco, Mauritius, Algeria, Western Sahara, Senegal and others.
To those who are reading this post, I am compiling a list of tech that I am bringing with me. Please help add to this list, off of your experience of being abroad.
Here is the list:
Shortwave Radio, Tecsun PL-660, for the immersion.
Tecsun AN-200 Loop antenna, for pulling AM stations.
Travel adapter, we all need one.
Portable MP3 player, to listen to music
A Portable Digital TV, for watching movies on USB.
An action camera w/lapel microphone, for capturing videos.
FM Transmitter, to show the locals what music is!
4G Mobile Data Router, internet is a basic human requirement.
Please suggest more!
I think that the AM and FM DXing will be breathtaking. The Canary Islands are located where I will be able to pick up African radio stations, but also Transatlantic Brazilian and American stations. Due to the high pressure and high temperature, FM Tropo is not rare in the Canary Island’s climate. Enabling this, it will spark my YouTube channel.
Thank you for reading this, and I hope the SWLing community help me. If you would like to contact me, email me at europedx(at)gmail(dot)com.
Yours,
Dean.
Thanks, Dean! You’re talking my favorite topics: radio and travel!
I know we have a number of readers who live in the Canary Islands. No doubt, you’ll get to experience some serious radio fun across the bands.
In terms of tips, I would suggest you assume your accommodation could be plagued with radio noise and you may be forced to find an outdoor spot to do all but your FM DXing. If you know where you’re going to stay, check it out on Google Maps and see if there’s an obvious safe spot to play radio outdoors. Of course, it helps if your accommodation has an outdoor space like a balcony, patio or garden.
Looks like you’ve got a pretty good checklist there. Here are a few additional items I typically take on a holiday DXpedition:
Earphones/Headphones (never leave home without them!)
A small back-up radio (if you have one–something like a Tecsun PL-310ET)
Did you know you can build your very own working 3D-printed radio – without any soldering, electronics experience, electric cord, or even batteries?
Digital Trends reports that’s exactly what talented Houston, Texas-based 3D-printing and electronics enthusiast Sage Hansen has created. And he’s willing to show you how to do it, too.
Called a crystal radio receiver, or sometimes a “cat’s whisker receiver,” this is an incredibly simple type of radio receiver that was popular in the earliest days of radio. The only power it requires to work is the received radio signal, which is used to produce sound. It is named after its most important component, the crystal detector or diode.
“AM radio was one of the first ways of transmitting audio to a very broad audience in the early 1900s, but it is still very popular today,” Hansen told Digital Trends. “It starts with the radio station converting their audio sound waves into electromagnetic waves, which can travel great distances.
Each radio station uses a specific frequency that is constant, but the sound waves are mixed so they amplify and modulate the base radio wave. What makes the crystal radio so exciting is how simple the circuit is, and how it can be made out of normal household items.
Many thanks to SWLing Post contributor, Dennis Dura, who notes that online retailer Herrington is promoting a 40% off sale on all of their Grundig radios.
Last week, my buddy Vlado (N3CZ) informed me about a small hamfest in Greenwood, SC–I had never attended, but had heard positive comments about it.
I believe Vlado was somewhat on the fence about going, but once I expressed a strong interest in selling some gear, he did too so it quickly became a plan!
Greenwood, South Carolina, is about a 2.5 hour one-way drive from my home. Vendors were encouraged to arrive around 7:00 to set up (general public admission was at 9:00), so Vlado and I hit the road by 4:30 AM!
Notice the lack of traffic on the interstate at 4:30 AM!
We arrived as the doors opened and purchased a total of three tables to sell our gear. My goods took up most of one table and Vlado packed the other two with his gear!
By general admission time, less than half of the vendor tables were occupied, which did worry me. However, overall foot traffic wasn’t bad at all! This vendor was certainly pleased.
I sold at least 80% of the items I brought with me, no doubt due to my generous and agressive pricing scheme (i.e. nearly giving things away–!). Vlado sold some large items, too.
In the end, I didn’t purchase a single item at the hamfest. I was in selling mode, not buying mode, at this hamfest as I’ve been making an effort to downsize some of my collection and use the money to offset the costs of travel this year. With that said, I would have snagged a classic portable had one appeared.
This BC-317 is just asking to be taken home!
Mind you, I was very tempted by two BC-317 receivers being sold together for an asking price of $60, but I resisted as the whole idea of “thinning the herd” is to make room in my small radio shack.
I find that small hamfests like Greenwood actually have better vintage radio pricing than the larger ‘fests.
Greenwood Photo Gallery
Though the hamfest was modest in size, there were quite a few quality offerings among the vendors. I was very impressed with the number of transceivers–indeed, a new ham would have had a selection of affordable benchmark 90s era rigs to choose from!
Click on the thumbnails below to enlarge or comment on the photos. Most of the photos were taken prior to the doors opening but I did my best to capture price tag information if available:
Do I plan to revisit Greenwood next year? You bet!
As you well know, Mark, I’m a certified pack and case geek. Seeing how well it fits your D-808, I know the Digitech AR-1780 should fit too.
How enabling of you, Mark! I think I’ll have to grab one of these. I have a couple of Otterboxes, but all larger (deeper) than this one. Purchasing a used case would be safe as Otterbox products are incredibly durable and nearly indestructible. Thanks for the tip, Mark!
It’s funny that, while I’ve written dozens and dozens of radio reviews over the years, I’ve never written even a single review that included an HD radio.
Well, the time to begin is now: HD radio, here we come.
Those readers living outside North America may be scratching their heads, asking, “What exactly is ‘HD radio?’” To answer in clear terms, I’ll turn the question over to Wikipedia:
HD Radio is a trademarked term for iBiquity’s in-band on-channel (IBOC) digital radio technology used by AM and FM radio stations to transmit audio and data by using a digital signal embedded “on-frequency” immediately above and below a station’s standard analog signal, providing the means to listen to the same program in either HD (digital radio with less noise) or as a standard broadcast (analog radio with standard sound quality). The HD format also provides the means for a single radio station to simultaneously broadcast one or more different programs in addition to the program being transmitted on the radio station’s analog channel.
Got that? In brief, HD radio is digital radio broadcasts that occupy the same FM/AM spectrum currently allocated for analog broadcasts. Wikipedia adds:
[HD radio] was selected by the U.S. Federal Communications Commission (FCC) in 2002 as a digital audio broadcasting method for the United States, and is the only digital system approved by the FCC for digital AM/FM broadcasts in the United States.
For my own part I had mostly ignored HD radio, assuming there would be few stations to listen to from my rural home location. That is, until recently, when I purchased a car that has built-in HD radio reception. I was impressed by the number of commercial stations I found that I can receive via HD radio. In truth, only a handful of the mainstream HD station offerings had any appeal for me, but I really took notice when I received a commercial-free jazz station via the HD2 channel of my favorite NPR member station, WFAE. Having been a jazz fan since I studied music in college, I was intrigued: could a portable HD radio receive this distant HD station reliably? I had my doubts; moreover, I really didn’t want to purchase a radio, then be obligated to send it back if it didn’t receive anything.
Instead, I contacted Sangean. The company was more than happy to send me a loaner radio for review. I requested the HDR-16––at the time it was Sangean’s most affordable HD portable, one about which a number of SWLing Post readers had expressed their curiosity.
Overview
The Sangean HDR-16 is a simple radio with a modern design. The chassis is a glossy black hard plastic and feels substantial. It has a useful fold-out carry handle and substantial telescoping whip antenna. The front face features a 16-character two-line backlit display, five function buttons, five dedicated preset buttons, and a dedicated power button. On the right side of the radio you’ll find a dedicated (two function) tuning knob and smaller volume/tone knob. The left side of the radio features an “aux-in” port, a “rec-out” port, an earphone jack, and a 7.5 volt “DC-in” port.
Features
HD Radio digital and analog AM / FM-Stereo reception
10 Memory Presets (5 FM, 5 AM)
PAD (Program-Associated Data) Service
Support for Emergency Alerts Function
Automatic Multicast Re-Configuration
Automatic Simulcast Re-Configuration
Auto Ensemble Seek
Real Time Clock and Date with Alarm and Sleep Function
2 Alarm Timer by Radio, Buzzer
HWS (Humane Wake System) Buzzer and Radio
Snooze Function
Tone & Bass Control
Information Display for Channel Frequency, Call Sign, Radio Text, Audio Mode, Service Mode, Signal Quality and Clock Time
Easy to Read LCD Display with Backlight
“Battery Low” LED Indication
Auxiliary Input for Additional Audio Sources
Record Output for Connecting to Hi-Fi System or Recording from Audio Program
I/O Jacks: DC In, Line-Out (Rec-Out), Aux-In, Headphone and HD / FM Rod Antenna
Audio
The HDR-16 sports two 2.5” front-facing speakers that deliver crisp audio that can be customized with simple treble/bass EQ settings. I found increasing the treble just a bit and the bass quite a lot produced the best audio for music broadcasts. Even the default audio settings are pretty good, however. The HDR-16 doesn’t have the rich fidelity of the Eton Field BT or the Tecsun S-8800, but it does offer stereo sound that is room filling and pleasant. Sangean obviously took audio fidelity seriously when designing the HDR-16.
The left side features AUX in, Record Out, Earphone and a DC power port.
Note that the the HDR-16 sounds especially good in spoken word/news broadcasts.
Operation and Ergonomics
The Sangean HDR-16 is a very simple and intuitive radio to operate. I sorted out all of its functions simply by following button and knob labels, but even the most tech-challenged person in your family could give the owner’s manual a single read-through and operate the HDR-16 with ease.
But let’s get one gripe out of the way…perhaps a case of simplicity gone too far: the HDR-16 only has five station preset buttons. Five! Actually, it offers a total of 10 memory allocations: five for AM, five for FM. Still…even in my rural market, I can easily program ten station memories on an FM radio, especially since HD Radio channels offer that many more new options. But the HDR-16 forces me to curate my presets down to a mere five stations per band. In my view, this strict limitation is an unfortunate design oversight.
Performance
The HDR-16 is an AM/FM radio that receives both legacy analog broadcasts and HD/digital broadcasts on both bands. I’ll break down performance by mode and band below.
HD performance
Digital FM
Of course, what I was most eager to explore was FM HD reception from my home. After unpacking the HDR-16, I placed the radio on my kitchen countertop and initiated an HD Seek scan via the dedicated button on the front panel. Couldn’t have been easier.
The HDR-16’s scan/seek functionality is impressively quick.
I quickly found there were a number of commercial radio stations––about four, to be exact––that I could instantly receive with little to no effort. Mind you, I live in a relatively rural market in a mountainous area. No doubt, if I initiated an HD radio search in LA or New York City, the dial would be chock-full of terrific stations.
All of the HD radio stations I received were either local, or powerhouses from neighboring markets. I was disappointed to find that I could not receive my most desired station, WFAE HD2.
I then moved the HDR-16 to a south-facing window and tuned to WFAE’s FM frequency of 90.7. I found I could easily receive the analog station and its RDS information, but still had no option to listen to HD2. After tinkering with antenna position and placement in our kitchen window, a sweet spot for reception was found, and voila! WFAE HD2 came in fully decoded, without any drops.
Recalling the days when I used to tinker with the rabbit ears on a TV, once I found that sweet spot, I carefully left the HDR-16 alone and didn’t move it further. As a result, over the course of the afternoon, I had nearly 100% copy from WFAE HD2.
I knew WFAE was a fringe station and checked their propagation map for HD radio. My location was actually outside of the fringe reception area. I looked up GPS coordinates of the WFAE 90.7 MHz transmitting site and found it is exactly 101 miles/162 km from my home.
Obviously, the HDR-16 is a sensitive HD radio on FM!
Via the 1/8″ stereo AUX in jack, you can use the HDR-16 as amplified stereo speakers for your favorite portable music device.
Turns out, FM HD reception is pretty flaky when dealing with fringe stations, though.
Over the course of the next weeks, I tried the HDR-16 in different positions and locations. There was only one spot in my house where the HDR-16 could get reliable reception of WFAE HD2. When I started the evaluation, it was August; our trees were still had a canopy full of green leaves. Sangean kindly allowed me to hang onto the HDR-16 to see if reception improved in late fall when all of the leaves were off the trees. As I write this review, we’re in winter, and the tree branches are bare. But curiously, reception of WFAE’s fringe signal is about the same as before. Nor have I noticed any difference in the reception of other commercial stations.
The HDR-16 accepts four C cells.
My conclusion is that the HDR-16 is a true performer on the FM band in HD mode. I have no other HD radios with which to compare it, but based on what I know about HD radio, this rig certainly exceeded my expectations.
Digital AM
The HDR-16 can also receive AM HD signals. There are far fewer AM HD broadcasters on the air, however. In fact, one of the first in our region dropped their HD coverage last year due to a lack of listeners.
With that said, I’ve read that a number of HDR-16 owners who live in the vicinity of AM HD broadcasters love the fact they get a digital audio quality signal on the AM band. One SWLing Post reader recently told me he even gets the occasional night-time AM HD DX signal with an HDR-16.
There are no local AM HD stations near me, and despite my best efforts, I never decoded an AM HD broadcaster in the evening. Perhaps if I did a little research and planning, then inductively coupled the HDR-16 to a MW mag-loop antenna, it would increase my chances.
Analog performance
FM
I’ve done almost as much analog FM listening on the HDR-16 as I have HD listening.
The HDR-16 can hold its own with most of my portable radios, in that it can receive all of my benchmark FM stations, and even some fringe analog stations.
RDS decoding also seems to be quite effective, even with fringe stations.
AM
AM (mediumwave) performance is surprisingly good. Perhaps my expectations were low, but I expected analog AM reception to be an afterthought. Or perhaps to have acceptable AM HD reception, Sangean had to put some extra effort into overall AM performance. Honestly, I don’t know, but what I do know is I’ve been pleased with the HDR-16 on the AM band. The AGC is pretty stable, noise relatively low, and sensitivity better than on other similar digital radios.
Many of my shortwave portables, like the PL-660, PL-310ET, and PL-880, could outperform the HDR-16 on the AM band, but frankly performance is on a level that it’s going to please most radio listeners. I’ve even had luck getting solid copy from one of my favorite AM DX stations, CFZM (740 kHz) with the HDR-16.
Should you purchase the HDR-16 for AM/MW DXing? No; there are better radios for this exclusive function. But for what I would consider a “bonus” band on a digital radio, I’m very pleased.
Summary
Every radio has its pros and cons. When I begin a review of a radio, I take notes from the very beginning so that I don’t forget some of my initial impressions. Here’s the list I’ve developed over the time I’ve spent evaluating the HDR-16.
Pros:
Excellent FM HD radio reception
Excellent FM analog reception
Very good AM broadcast band reception for a modern digital portable
Good audio from internal stereo speakers
Nice carry handle that tucks away
Both auxiliary-in and -out jacks for audio
Dedicated earphone jack
Design is compact, sleek, yet sturdy
One of the more affordable HD radio options currently on the market
Easy access to bass/treble tone controls through volume multi-function
HD seek functions work on all but the most fringe stations
Cons:
No ability to internally recharge C batteries
No external antenna jack to improve FM HD reception with directional antenna
Limited to just 10 memory presets (five for AM, five for FM)
Fringe HD stations may continuously flip between digital and analog, annoying when HD station content and analog broadcast content are quite differentUpdate: I recently tried to have the receiver replicate this behavior but it did not, so I’m striking it from the cons list!
Conclusion
Can I recommend the HDR-16? Absolutely.
If you’re looking for an AM/FM HD radio that’s well-rounded, simple to operate, and provides quality audio, I don’t believe you could go wrong with the HDR-16. The HDR-16 has proven to me that it’s a worthy FM HD receiver as it’s sensitive enough to snag fringe HD stations with some reliability. I’m certain I could design a small FM antenna and get 100% copy from my favorite HD station 101 miles from my home.
I think the HDR-16 would be a safe purchase for anyone, as it’s easy to operate, relatively compact, and makes the process of seeking HD stations a breeze.
I’m especially pleased with the HDR-16’s AM analog reception. It pleasantly surpassed my expectations and makes it easy to recommend the HDR-16. The HDR-16 is one of the few HD portables that also includes AM HD reception.
If you’re looking for a well-rounded HD and analog portable, grab the HDR-16. If you’re looking for a mediumwave DX machine, go for a benchmark mediumwave radio instead, like a GE Super Radio, C.Crane CC Radio 2E, CC Radio EP Pro or even a “Holy Grail” vintage Panasonic RF-2200.
I like Sangean’s high gloss finish (though it does show fingerprints rather well!).
I’m very tempted to purchase the HDR-16; I’ve found it difficult to justify, though. Living in a rural location, I have fewer HD stations to choose from––all but one are commercial, chock-full of advertising, and lack any real variety and diversity. I am very pleased with WFAE’s jazz station on HD2, but it’s hard to justify a $100 purchase just to receive one station over the air. Especially since I can easily stream WFAE HD2 from my Sangean WFR-28, Como Audio Solo, or Amazon Echo.
But if I lived in an urban area, with the accompanying diverse radio market, I wouldn’t hesitate to buy the HDR-16.
Here are some retail options for the HDR-16––at the time of this writing, almost all retailers price it at $100–Amazon, New Egg and some eBay vendors offer free shipping:
In closing…I should add that there’s another tempting Sangean HD radio coming just around the corner: the HDR-14. It’ll be priced lower than the HDR-16, and is even more compact, suggesting that it might make an excellent portable for the traveler. I will certainly review the HDR-14 when it’s available, as I’ll be very curious if its equally effective at snagging fringe HD FM stations. Note that the HDR-14, unlike the HDR-16, has only one speaker, so I doubt audio fidelity will match that of the HDR-16, which should be a better choice for home and local use.
Many thanks to SWLing Post contributor, Kevin Turinsky, who notes that NPR is having a “final” clearance sale on the excellent C. Crane CCRadio-2. The price is $110.11 US plus shipping.
Several readers have requested “under the hood” photos of each radio, to compare internal designs. This morning, I had a few minutes to crack open each radio and take a few shots. Note that I didn’t pull off the circuit boards from the chassis or try to take a look behind shielding. I have yet to do proper performance comparison tests with these radios and didn’t want to accidentally compromise one (especially since the XHDATA D-808 is getting complicated to purchase here in the US).
Inside the XHDATA D-808
Opening the D-808 requires pulling off the encoder knob and removing a total of six small screws. Note that one of the screws is located in the battery compartment. Click photos to enlarge:
Inside the Digitech AR-1780
Opening the AR-1780 requires pulling off the encoder knob (not an easy task on my unit) and removing a total of seven small screws. Note that two of the screws are located in the battery compartment. Click photos to enlarge:
Last year, at Hamvention, I picked up a Panasonic RF-2200 for $70. It came with the original box, manual and was in superb cosmetic condition.
The seller told me that over the years he exclusively used the radio to listen to a local FM station.
At that price, I didn’t hesitate to make the purchase even if this would have simply been a non-functioning parts radio for my other RF-2200.
After I brought the radio home, I unpacked it and gave it a quick test.
FM worked brilliantly. Mediumwave and shortwave, however, were essentially deaf. I made the assumption that the ‘2200’s switches and pots likely needed cleaning with DeoxIT. The next day, I was leaving for a two month trip to Canada though, so I packed the RF-2200 back into its box and set it to the side of my shack table.
Fast-forward to yesterday…
While digging around my shack, I re-discovered the boxed RF-2200. Since I was planning to visit my buddy Vlado (the best radio repair guy in the world) yesterday evening, I thought I’d take the RF-2200 and do a proper contact cleaning. Several of the RF-2200’s switches and pots cannot be easily cleaned without removing the chassis.
(Click photos to enlarge.)
Vlado is familiar with the RF-2200 and since it’s not the easiest radio to work on, I asked for his expert hands on the job. Within seconds of handing him the radio, he plugged it in, tested the switches and pots, then removed the back cover (disconnecting the battery compartment leads) and then the front cover (disconnecting the speaker leads).
The magic behind the RF-2200’s classic analog dial: Vlado offered a word of caution to anyone operating on their RF-2200: as you can see in the photo below, the dial string snakes around the front of the radio and is very close to some key components. You must exercise caution when having a soldering iron tip near the string, or using lubricants nearby.I didn’t realize this, but by the time Vlado started taking apart the RF-2200, he had already determined that even though the contacts needed cleaning, this wasn’t the source of the audio problem for the MW and SW bands.Vlado expertly pulled out the pot for the FM/AM/SW selection–not an easy task–began cleaning it, testing it and re-soldering contacts.
Vlado determined the pot was actually in good shape, thus started testing the rest of the circuit.
After a few minutes of performing tests and getting intermittent performance, he determined that at least one, if not more, of the RF-2200’s caps need to be replaced. Of course, neither one of us was terribly surprised. At this point though, it was getting late and I had an early wake up time in the morning, so I left my RF-2200 with Vlado.
Am I worried about this prognosis? No, not in the slightest…
Doctor Vlado is on the job!
Vlado will have the RF-2200 back on the air in no time, working as well as it did when it was new. He’s actually performed a similar RF-2200 repair for an SWLing Post reader and I’m willing to bet this repair job is relatively simple compared to most he encounters (including the Icom IC-7200 he recently repaired after it was hit by lightening!).
I’ll try to post a “Part 2” update with photos of the RF-2200 repair. Follow the tag: Panasonic RF-2200 Repair
I’m currently spending the better part of a week at Cape Lookout State Park on the Oregon coast, with a great view of the ocean through tall evergreen trees. This is one of my favorite parks in the Pacific Northwest, especially when DXing during the blustery winters from one of the nice cabins at Cape Lookout.
The view from the beach near my cabin; the turbulent waves were a precursor to the gale force winds at the park during the night of the 23rd!
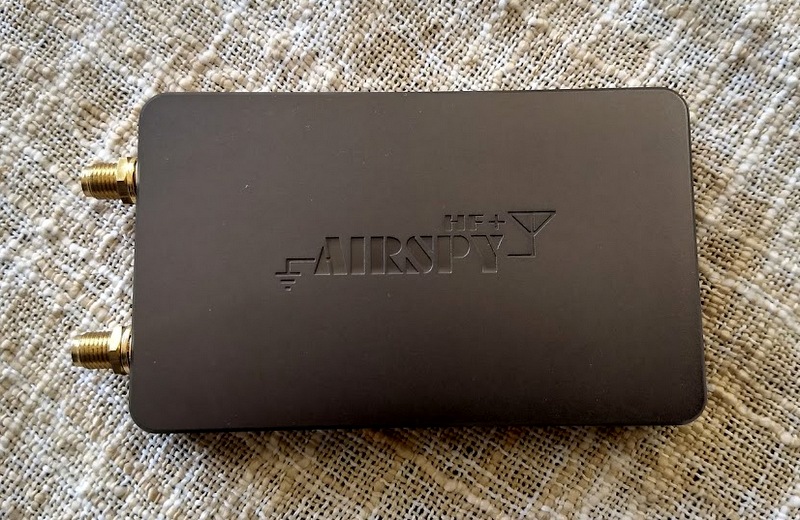
Although I’m at the park for trans-Pacific medium wave DXing, I’m also comparing receivers, both SDRs and portables. This morning I sought out a few weak shortwave signals, pitting the Elad FDM-S2 SDR ($529 USD) against the AirSpy HF+ ($199 USD). I have a pair of the HF+ receivers to cover all of medium wave (as the FDM-S2 easily does). Many SWLing Post readers already know that the upstart HF+ trades bandwidth to gain high performance in order to keep the price reasonable.
My antenna used for the following recordings was a small “Flag” antenna using a Wellbrook Communications FLG100LN module and a 2K ohm variable potentiometer for termination. The design uses crossed tent poles in an “X” formation to support the wire loop. This design travels easily in a compact package; I have Dave Aichelman of Grants Pass, Oregon to thank for this very useful “tent pole loop” implementation of the Wellbrook FLG100LN.
The Wellbrook-based antenna functions superbly, and its low-noise design helps hold down QRM from the nearby cabins (which unfortunately have been “upgraded” recently with noisy cold fluorescent [CFL] light bulbs). The area around the Cape Lookout cabins used to be superbly low noise and suitable for radio listening, but now it is more of a challenge than before. The Wellbrook FLG100LN is perfect for the situation though; Wellbrook ALA1530LN Pro and ALA1530S+ 1-meter loop antennas work commendably at the park too.
The Wellbrook FLG100LN module with a home brew RFI choke in-line
A 2K ohm variable potentiometer is protected from the elements in a small plastic bag. The “pot” is adjusted for the best nulling of medium wave stations off the back side of the antenna’s reception pattern.
The “tent pole loop” antenna is strapped to a fence railing with ultra-strong Gorilla Tape to keep the 7-ft. square loop vertical.
On with the recordings…
For the FDM-S2 and HF+ comparisons I used the SDR-Console V3 software. Every parameter was identical for the receivers–sampling bandwidth, filter bandwidth, AGC, mode and so on.
Take a critical listen to the weak signals recorded with the SDR receivers, identified as only “Radio A” and “Radio B”.A link to a poll is at the end of this article;please indicate which recording of each pair has the most intelligible audio in your opinion, and submit your choices when you’ve made up your mind on each audio clip. After a week or so I’ll post the results of the voting, and identify the receivers.
9.615 MHz, LSB, Radio A
9.615 MHz, LSB, Radio B (note: the same male announcer heard in clip “A” begins at 00:14 in this “B” clip)
9.730 MHz, USB, Radio A
9.730 MHz, USB, Radio B
7.230 MHz, S-AM, Radio A
7.230 MHz, S-AM, Radio B
9.860 MHz, S-AM, Radio A
9.860 MHz, S-AM, Radio B
Note on 7.230 MHz recording: this was an interesting frequency, as the signal was tightly surrounded by a very strong local 40m ham radio LSB station as well as a strong China Radio International signal. There were other strong amateur and broadcast stations within 30-50 kHz of 7.230 MHz, also. This A-B test more than the others may indicate receiver performance in a strong RF environment on a crowded band.
Ready for the poll? Register your votes at the Google Docs form below:
In a week to 10 days I’ll post the results in another article. NOTE: I haven’t provided a “both sound the same” choice in the poll to encourage you to ‘dig deep’ into the audio and listen critically–to find something that stands out in one clip versus the other.
Guy Atkins is a Sr. Graphic Designer for T-Mobile and lives near Seattle, Washington. He’s a regular contributor to the SWLing Post.
I’ve been following this listing the past few days–the seller actually launched the item with a very low starting bid.
eBay unearths so many products that I would have never known existed. This military receiver is certainly a case in point.
As the seller states, I imagine the original price tag for this receiver was hefty–likely thousands of dollars. The front panel lacks many of the controls we’d like to see on an HF radio (bandwidth, RF gain, notch, etc.), however, I imagine there are a number of functions on the backlit screen and possibly accessible via an external monitor and/or keyboard.
I’m curious: are there any SWLing Post readers out there who can comment about the performance of this receiver? Have you ever put one on the air? Please comment!
Many thanks to SWLing Post contributor, Ivan (NO2CW), who writes:
Hello, I posted on YouTube my review of the Sangean WFR-28 FM and Wifi Internet radio receiver.
In particular I was able to sideload my directory of English Language broadcast stations from over 100 countries using their “Favorites” menu. It now sounds like the good old days of shortwave …almost. I can listen to the morning traffic report in Singapore, local news from Guam, afternoon talk show from Gibraltar and a nighttime DJ from Uganda – all in English.
Of course, a number of personal assistant device like the Amazon Echo also stream radio via the TuneIn Radio aggregator, but since these devices rely on voice commands, some stations can be difficult to call up. I still prefer a proper WiFi radio/Internet appliance like the Sangean WFR-28 or Como Audio Solo.
Many thanks to SWLing Post contributor, Rawad Hamwi, who writes:
Hi Thomas
Recently I was looking over the internet for some high resolution images for an opened Sony ICF-SW7600GR, but could not find much.
So…I took the “risk” and I opened mine! The main purpose was to clean it from dust, since I am living in a quite dusty environment
I was amazed how easy the process was. It was like eating a piece of cake! Remove the 5 screws and viola! that’s it! You can definitely see the Japanese quality inside.
So, I would like to share with you some high resolution images and somebody may use them for reference too!
Thank you so much for sharing these, Rawad! Excellent photos that will, no doubt, prove useful to those wishing to repair or modify the Sony ICF-SW7600GR.
The following review first appeared in the January 2018 issue of The Spectrum Monitor magazine.
Those who know me know I’m all about travel, and all the things that make the travel experience enjoyable. I like to pack light, taking only the essentials, and if I’m traveling by air, I can easily fit two weeks of fun into one small carry-on. To me, the idea of lugging a huge suitcase, being subject to lost check-in luggage, and fretting over finding room in an overhead bin to squeeze in a huge bag simply has no appeal. Even though I often opt for the budget ticket, which means loading later, I know I can literally be the last one on board without fear because my travel bag is so compact that, if nothing else, it will fit underneath the seat in front of me.
Yet even though I travel light, I never ever travel without a radio. That’s a given in my bag. Since packable real estate in my carry-on is at a premium, I opt for the most bang-for-buck I can manage in a portable radio.
My radio travel partners
To date, I have a few favorite full-featured travel radios and know quite well both their strengths and weaknesses. Here’s a list with some notable pros and cons:
Pros: A 1990s era marvel of compact technology, it sports SSB mode, sync detection, headphone and audio out jacks, external antenna jack, and long life on two AA batteries. It has excellent sensitivity and selectivity. No muting between frequencies spoils listening pleasure.
Cons: Speaker audio is poor, no FM RDS, no weather radio, no AIR band, the battery cover may be easily broken, ribbon cable can break (in early models) and the clamshell design, while a cool feature, isn’t always practical and makes the unit feel prone to damage. Plus, the SW100 series is no longer manufactured and, due to desirability, typically have a price point well above the competition.
Pros: A compact, ergonomic full-featured radio which sports SSB mode, AIR band, external antenna jack, reasonable audio from internal speaker, very good shortwave and mediumwave performance for the size. No muting between frequencies.
Cons: Rubberized coating becomes sticky as it deteriorates, no weather radio, no audio-out jack, no RDS, and it’s no longer manufactured.
Pros: Very affordable (typically $40-50 shipped), excellent shortwave, mediumwave and FM reception, external antenna jack, average audio fidelity from built-in speaker, internal battery charging, common 5V mini USB plug, reasonably durable.
Cons: No SSB mode, no weather radio, no AIR band, no RDS, no dedicated audio-out jack, limited shortwave coverage compared with other portables 2.3 – 21.95 MHz
Pros: SSB mode, great shortwave, mediumwave, fm reception, vertical form factor great for handheld listening while walking/hiking, external ferrite bar antenna enables excellent AM/mediumwave reception.
Cons: Vertical form factor means it’s prone to fall over if placed on a bedside table, no direct entry keypad for frequencies, tinny audio from built-in speaker, no RDS, no AIR band, detachable external ferrite bar antenna is an extra piece to keep up with while traveling.
Pros: SSB mode, AIR mode, squelch control, FM RDS, dedicated fine-tuning control, external antenna jack, internal speaker provides better audio than other compact travel radios. Excellent sensitivity.
Cons: Slightly larger form factor than other travel radios. Somewhat awkward ergonomics. 7 VDC power port is non-standard. No dedicated audio out jack.
Pros: Overall excellent performance on shortwave, mediumwave, and FM. AIR band, North America weather radio (excellent sensitivity) with alerts, squelch control, common 5 VDC USB mini power port with charging capability, a great value at $89
Cons: No SSB mode, no external antenna jack, no RDS,
What radio I decide to pack really depends on the type of trip I’m taking.
If I really want SSB mode to listen to HF pirates, ham radio, or utility stations, I tend to grab the Sony ICF-SW100, the Grundig G6, or more recently, the Digitech AR-1780 [and now the XHDATA D-808].
If I plan to do extended hiking or walking during my trip, I might grab the CountyComm GP5-SSB.
If I only plan to listen to AM/FM/SW broadcasts, and it’s a short trip––or one during which the radio might receive rough treatment––then I might grab the Tecsun PL-310ET. If I leave the PL-310ET in a hotel or drop it, I’m only out about $40. I’ve even been known to simply give one of these to someone, like a kid for example, who shows a fascination in shortwave radio.
If I plan to do off-air audio recordings during my travels, then the Sony ICF-SW100 because it’s the only radio with a dedicated audio-out port. Plus, it’s a great performer.
If I’m travelling by air, however, I almost always choose the CC Skywave: its unique combination of AM/FM/SW coverage, NOAA weather, and AIR band are simply hard to beat. It’s compact, durable, and gets the job done. Plus, the Skywave seems to operate for ages on a set of AA batteries. C. Crane really knocked it out of the ballpark with the CC Skywave.
But there was one glaring omission on the original CC Skywave: Single-sideband (SSB) mode.
Enter the CC Skywave SSB
Earlier this year, I learned about a new radio in development at C. Crane: the CC Skywave SSB. I saw a Beta unit very early on and a few weeks later, knowing how much I appreciate the original Skywave, C. Crane asked me to help test the new Skywave SSB. I was happy to do my bit.
I actually do quite a bit of alpha- and beta-testing for manufacturers. While it’s time-consuming volunteer work, and requires meticulous attention to detail––even seemingly minor details––it gives me an opportunity to have meaningful positive impact on an upcoming product. Manufacturers that actively involve enthusiasts in their testing phase tend to produce better quality. I wish all manufacturers did this (yes, Tecsun, I’m looking squarely at you!).
After the Skywave SSB arrived, I started putting it through its paces. Typically, pilot run units have quirks and glitches buried in non-standard operating procedures. Try as I might, I couldn’t find any on the Skywave SSB. I’ve since learned that C. Crane invests heavily in pre-production testing; I saw their full list of iterative notes, and they were incredibly detailed. Result? No obvious problems. I’ve always believed that while C. Crane doesn’t always produce the most affordable products––nor do they stuff every bell-and-whistle into them––what they do produce is well thought out, user friendly, well documented, and performs at or near the top of its class.
Features
The CC Skywave SSB comes with a surprising amount of features for such a compact radio. Many of these features are also found on the original CC Skywave.
I’ve placed upgraded features in bold:
AM, FM, NOAA Weather band plus Alert, Shortwave (1711-29.999MHz) with SSB mode, and Airband
Frequency direct entry, plus auto scan and store
Lighted LCD display
Selectable fast or fine tuning (on all bands except weather)
Dedicated fine tuning control, selectable on front panel
400 memory presets
Runs on 2 AA Alkaline batteries (not included)
(Optional) CC Skywave AC power adapter w/ mini USB plug required for charging NiMH batteries.
Stereo headphone jack and fold-out back stand
Clock with 12/24 hour format and alarm
Rotary volume knob
Squelch control
High quality CC Buds Earphones and radio carry case included
Run Time (on batteries––approximate):
± 70 hours (earbuds)
± 60 Hours (built-in speaker)
10 Aviation Memories can be scanned for activity
You’ll notice there are actually very few obvious upgrades from the original Skywave to the Skywave SSB: just SSB mode, expanded HF coverage (from 1,711 to 29,999 kHz), and dedicated fine tune button/control. I’ve also learned that aviation band scanning is much faster on the newer model than on the original Skywave.
Other than those items, in terms of features, it’s very similar to the original CC Skywave.
Appearance
CC Skywave SSB (left) and the original CC Skywave (right)
The original Skywave and Skywave SSB are nearly identical in terms of form factor; overall dimensions are identical (4.8″ W x 3″ H x 1″ D), although the Skywave SSB weighs 1.2 oz more than the original––a difference that’s scarcely detectable.
The tuning knob, volume control, power port, and headphones jack are in the same places on the SSB. The chassis color is different, however; the original Skywave is black, whereas the new Skywave SSB is grey––a dark warm or “dim” grey,” to be accurate.
Original CC Skywave (left) and CC Skywave SSB (right)
Where one finds the true difference between the new Skywave SSB and its predecessor is on the front panel. The Skywave SSB has dedicated buttons to enable both SSB mode, select upper or lower sideband, and a fine-tune control. The Skywave also has a dedicated backlight button. This accounts for a total of four additional buttons compared with the original Skywave.
In a rather nice touch, both the SSB and fine tune buttons have tiny red LED indicators to let the user know when they’re engaged.
The CC Skywave SSB also has a redesigned speaker grill which more closely resembles the grill on their CC Pocket radio. Much to my surprise, once I shared detailed photos of the CC Skywave SSB, many of my readers expressed their disappointment with the speaker design. Many claimed it looked “cheap” as compared with the original Skywave and thus felt the chassis might be more subject to breakage. Some even got the impression that the speaker grill was raised in a way that it would lend itself to harm.
Actually, this is not accurate. Though it may appear that the speaker grill is elevated in photos, it’s actually in a recessed portion of the chassis and surrounded by an absorbent rubber ring, rising only ? 1 mm above the chassis, if that. And the hard plastic case feels as solid and robust as any portable I’ve tested. I wouldn’t hesitate to toss it in my pack.
Personally, I think the Skywave SSB is a handsome little radio! Perhaps I’m not as sensitive as others about chassis design, but I’m actually happy it’s not a clone of the original Skywave, making it much easier for owners of both models to distinguish them when packing!
From Pilot/Beta to production
While C. Crane allowed me to post a number of photos once the product announcement had been made, I would not publicly comment on performance. Indeed, I never post performance comments about pre-production units since I wouldn’t be evaluating the same product that hits the store shelves.
So once C. Crane posted an ordering page for the Skywave SSB, I placed an order, just like everyone else.
In truth, I was told there were only minor differences between the pilot unit and the production unit: some silk screening and other very minor changes.
Production Quirks
I was eager to get started on the review of the Skywave SSB, so as soon as I received it, I did what I always do: compared it with other radios!
I make my comparisons, by the way, at least fifty yards from my house to separate the radios from any inadvertent sources of local noise.
Production Radio #1
My first comparison was with the Digitech AR-1780 and the original CC Skywave. I quickly noted that the Skywave SSB was very slightly less sensitive than the other radios. I had tested the pre-production unit enough to know that the Skywave SSB’s performance should at least be on par with, if not a little better than, the original Skywave.
Upon careful listening, I discovered the production unit had a faint, internally-generated whine on some of the shortwave bands; when tuned to marginal signals, this whine manifested in the form of variable background noise. Between signals it was audible as a faint background whine, hardly noticeable. With that said, the whine was most notable while tuning––since the Skywave SSB mutes between frequency changes, the whine was most conspicuous during audio recovery between steps.
The pre-production unit had no trace of an internally-generated whine. Audio was very clean in comparison.
Here’s a sample of the first production radio being tuned down from 10,000 kHz in 5 kHz tuning steps:
I contacted C. Crane promptly, and to their credit, they immediately dispatched another unit from inventory, via UPS Next Day, along with a return label to send my faulty unit back to their engineering team.
Production Radio #2
The second unit arrived while I was on Thanksgiving vacation, but was sent to me directly at my hotel. The day I received the replacement Skywave SSB, I put it on the air. The first listening session with it, alone, revealed that this unit did not have the internally-generated whine, however, this unit had issues with sensitivity. All of my comparison receivers were outperforming this Skywave SSB on the shortwave broadcast bands. When I compared it with the pre-production Skywave SSB unit and the first production unit, the second production unit was about four to five S-units less sensitive…Odd.
I sent both production radios back to C. Crane with detailed notes and sample recordings. Their engineering team confirmed my findings and started looking into the variations in QC and double-checking their inventory to make sure none shipped with these problems.
Production Radio #3
A few days later, I was sent a third production unit. After putting it on the air, I immediately noticed the same faint noise characteristics of my first full production unit, which is to say, the notorious whine.
Once again, I contacted C. Crane. This time, I requested that no less than three radios be sent to me, and that they kindly expedite the request.
Production Radios #4, #5, and #6
I tested all three radios from this final batch of production units. What follows is an assessment of those radios.
First production run noises
I spent two full hours searching for birdies (internally generated noises) and other anomalies on the three CC Skywave SSB production units I received that Monday. Each radio’s noise location varied slightly (within 20-40 kHz).
Birdies
Birdies are a fairly common occurrence among sensitive receivers, and the CC Skywave SSB has about an average number. Fortunately, the birdies I noted are outside the space where I do my broadcast listening:
2,305 kHz
9,220 kHz
11,520 kHz
Background audio whine/tone
All of the production units (save Radio #2) had a very slight audio whine present––either via the internal speaker or headphones––on certain portions of the spectrum.
In the first full production unit I received, I believe this whine may have slightly affected the unit’s overall sensitivity. On the last three production units I received, the whine didn’t seem to have as much of an impact on overall sensitivity.
The whine is still there, however. And occasionally when the unit is tuned to a weak signal within one of these zones, other faint sweeping noises can be detected in the background.
Sometimes it’s even more noticeable when the broadcaster is weak and is located within one of the “whine zones.” Here’s an example of 10 MHz WWV time station comparing the original Skywave with the Skywave SSB. Note that at the time this was recorded we had terrible propagation due to a geo storm, so WWV was very weak, indeed.
Here are the frequency ranges where I noted the background whine:
7,830 – 8335 kHz
8,610 – 8,690 kHz (note: very faint)
9,770 – 10,415 kHz
11,585 – 11810 kHz
Another oddity is a noise I found prevalent on CHU Canada’s 7,850 kHz frequency. I’m guessing it may be due to the presence of a DSP birdie on top of a relatively strong broadcaster.
Here’s a video comparing the original Skywave with one of the production models:
I noted no birdies or noises on the mediumwave band.
I’ve no doubt, C. Crane will tackle these issues and solve them by the time the second production run ships.
In the meantime, I’ve become somewhat of an expert on the CC Skywave SSB, having evaluated a total of seven models and spending more time evaluating them than I have any other portable.
Let’s take a look at what we can expect from the CC Skywave SSB with these first production quirks aside.
Audio
Like its predecessor and many other travel radios (the Digitech AR-1780 and XHDATA D-808 being notable exceptions) the Skywave SSB’s audio from the internal speaker is adequate. It’s just shy of what I would call “tinny” because it does cover the mid-range . For spoken word content in AM and SSB, it does the job quite well. With music, you simply can’t expect any bass notes or room-filling audio. But then again, in a compact radio, my expectations are simply lower. The Digitech AR-1780 and XHDATA D-808 have the best audio of my compact travel radios, but they’re also the largest, so have a slightly bigger speaker.
I did note a minor amount of background hiss present somewhere in the audio amplification chain on the first production run units–most noticeable via headphones.
With the supplied CC Buds, you’ll be a happy camper.
Audio sounds rich via the headphones jack.
Performance
Of course, what we all want to know is how well the CC Skywave SSB performs. In a nutshell (spoiler alert!) it’s very similar to the original Skywave.
I break this down band-by-band below, starting with my favorite band.
Shortwave
Keeping in mind the frustrating experience with quality control, when I received the final three production units, I was very pleased with performance on the shortwave bands. The AGC characteristics are relatively stable, making weak signal listening a pleasant experience. Even though the Skywave SSB lacks a synchronous detector, I found that stability––even with periods of notable selective fading––is impressive.
In the realm of compact travel radios, both my pre-production and (better functioning) production models are strong performers. The Skywave SSB is slightly less sensitive than my larger, full-featured portables like the Tecsun PL-660, PL-680, PL-880, and Grundig Satellit. All of these radios, however, have longer telescoping whip antennas. If I add the gain from the included CC Reel antenna, the Skywave SSB can even hold its own with many of these.
I’ve been very pleased with the original Skywave for broadcast SWLing for a few years now. I’m happy to report that the Skywave SSB offers an incremental improvement over the original Skywave.
FM
Much like other modern DSP portables, FM performance is stellar for such a compact radio. The Skywave SSB was able to receive all of my benchmark FM stations. While audio fidelity from the Skywave SSB’s internal speaker is not a strong point, via headphones you’ll be quite pleased.
AM/Mediumwave
I’ve found the Skywave SSB to be capable mediumwave receiver. Performance characteristics are very similar to the original Skywave and the AGC settings even make MW DXing a pleasant experience. Since the internal ferrite bar isn’t terribly large, better performance can be achieved by coupling the Skywave SSB to an inexpensive loop antenna, like the Grundig AN200 AM Antenna.
Weather radio
Like the original Skywave, the Skywave SSB is an impressively capable weather radio receiver. From my home, I’m able to pick up a marginal NOAA weather radio frequency that most of my other weather radios cannot. The Skywave SSB also includes a handy weather alert feature that will monitor your chosen NOAA/Environment Canada frequency and wake up the receiver if an alert is issued.
Note that the weather alert feature works on a timer and, most importantly, if operating from battery, drains batteries as quickly as if you were monitoring a live station with the squelch open.
AIR band
While I didn’t compare performance with a triple conversion scanner, I’m favorably impressed with AIR band performance. During my tests, I noted no imaging or overloading on the AIR band, a very good thing. Additionally, the Skywave SSB offers improved scanning features for the AIR band, making it easier to monitor ground, tower, and even approach/departure frequencies at larger airports. When employing the squelch feature, you almost get the impression you’re holding a scanner, rather than a shortwave portable, in your hands.
Longwave
Like the original CC Skywave, the SSB does not cover the longwave band. In North America, there is very little to listen to on longwave, so many consumers will never take notice. I’m sure longwave DXers will wish it was a part of the package, however. Admittedly, when I’m traveling in Europe and other parts of the world where there are still stations on longwave, I’ll certainly miss the band.
Comparing to other compact travel radios
Trying to decide if the CC Skywave SSB will have the performance characteristics to displace my other travel portables, I compared it with the radios I mention at the beginning of this article.
In terms of overall sensitivity and selectivity, the CC Skywave SSB essentially runs neck-and-neck with, or in some respects slightly edges out, the Tecsun PL-310ET, Grundig G6, and CountyComm GP5-SSB.
However, both the Sony ICF-SW100 and the Digitech AR-1780 are more sensitive than the Skywave SSB. The Digitech AR-1780 has the best audio characteristics of the competitors, but is also slightly larger and heavier than the others.
Note, too, that the Sony ICF-SW100 and Grundig G6 are the only radios in this comparison that don’t mute between frequency changes. They’re the best band-scanning receivers.
And how does the Skywave SSB compare with the original CC Skywave? I find that the Skywave SSB has a slightly lower noise floor which is perhaps helped even further by better audio/tone characteristics. Sensitivity is about the same, but signals pop out of the background static better on the Skywave SSB.
In terms of features, the Skywave SSB likely offers the most for the traveler.
Summary
Every radio has its pros and cons, of course. When I begin a review of a radio, I take notes from the very beginning so that I don’t forget my initial impressions. Following is the list I’ve formed over the time I’ve been evaluating the CC Skywave SSB:
Pros:
Overall well thought out, considerate design
Excellent form factor for travel
Very good sensitivity and selectivity for a compact radio
Faster AIR scanning compared with the original Skywave
Better HF frequency coverage than the original Skywave (1.711-29.999 MHz, compared to 2.300-26.100 MHz)
Pleasant SSB audio
Multiple bandwidths in both AM and SSB modes
No overloading noted
Well-written operation manual
Excellent weather band reception
Nice red LED indication lamps for SSB and Fine Tune engagement
Supplied with:
a quality external reel antenna
CC Buds earphones
Soft case with Velcro closure
Excellent battery life from two AA cells (AA cells are a plus for travelers as they’re so ubiquitous)
Cons:
Inconsistent quality from initial production run (likely corrected in future runs)
Mutes between frequencies while band-scanning
Engaging SSB mode requires 2-3 seconds of delay (common for this DSP chip)
Some ticking noise in audio when pressing buttons (identical to the Digitech AR-1780)
No RDS
No audio-out jack
No longwave reception
ATS Scanning in 1st production run stops at 26,100 kHz
No synchronous detection (though not expected in this class of compact portable)
Shortwave ATS tuning time about half as fast as the original Skywave (original is quite speedy!)
$149 price is at the top of its class
Conclusion
I love the CC Skywave SSB. Sure, I wish it had RDS, an audio-out jack, didn’t mute between frequencies, and was a little less expensive. But overall, it’s a fantastic package. I’m impressed with the amount of performance the Skywave SSB provides with such a short telescoping antenna.
Most reading this review will be scratching their heads wondering if: a) having SSB mode is worth the $60 premium over the original Skywave ($89 vs. $149)? and b) is any compact radio, for that matter, really worth $149––?
Because of how I travel, I would say that I easily use ultra-compact portables like the Skywave SSB about 70% of the time I’m found listening to portables.
When the Skywave SSB was first placed on the C. Crane website, they posted a price of $169––when the units started shipping, they reduced the cost to $149, and reimbursed those who had placed an order with the higher price.
Though the initial $169 price made me wince a bit, I still ordered one. Why? Because to me being a traveler who loves an ultra compact, having an ergonomic, full-featured, durable, compact travel radio with SSB, AIR and NOAA weather radio is worth it!
Therefore, the CC Skywave SSB will be my travel radio of choice going forward––it’s essentially a Swiss Army Knife of a travel radio.
There’s another factor, too: I trust C. Crane. Despite the frustrating quirks I experienced reviewing my first production run units, I know C. Crane takes care of their customers in the long run, and will replace any faulty units without hesitation. They’ve taken every item of feedback I’ve provided directly to their engineers and quality-control specialists, and the work continues to resolve this radio’s concerns. If you have a Skywave SSB with noise, don’t hesitate to contact C. Crane about it.
Overall, I am optimistic about this radio. I expect the second production run will produce radios performing as they should––like the final production units I tested, but without the internally-generated noises. And if this occurs as I expect, you can expect good performers.
At any rate, I know this: I’ll be one of the first to test units of their second production run…and to let you know just what I find. (Bookmark the tag CC Skywave SSB for updates.)
Looking north toward Cape Lookout, Oregon, near the site of my SDR receiver recordings. Photo courtesy of Wikimedia Commons. In my original article 10 days ago, I set up a SWLing Post reader poll to let you give your opinion on which shortwave recordings within four pairs of audio files provided the most intelligible result. The recordings were intentionally noisy, low-level signals to help us discover–through critical listening to the files–if there is a clear favorite between the AirSpy HF+ or the Elad FDM-S2 receivers. Of course, there were only four pairs of recordings…not a very large sample size.
However, 34 readers of the original article took the time to listen and respond, so let’s get to the numbers, shown in these graphs:
Interestingly, the responses above seem to point to:
Two recording pairs tied in the results (50% / 50%) or were very close (HF+ 52.9% / FDM-S2 47.1%)
The FDM-S2 led one recording pair by a large margin (67.6% / 32.4%)
The HF+ led another recording pair by an equally large margin (67.6% / 32.4%)
Taken as a whole, no obvious winner emerged, although one might conclude the HF+ has a slight edge due to its lead in the “very close” recording pair of 7.230 MHz.
One thing is clear–the AirSpy HF+ is a surprisingly good performer for its price of $199 USD! For many enthusiasts this will be all the SDR they need.
As a final note, I’ll mention that the AirSpy HF+ used for the tests was totally stock. I have not yet performed the “R3 Bypass” mod nor the firmware update to my HF+ units. The simple R3 Bypass, discussed at length on the AirSpy Groups.io forum, significantly boosts sensitivity of the HF+ from longwave up to about 15 MHz, without any noted overload issues. For more on this modification from a MW DXer’s perspective, read Bjarne Mjelde’s insightful article at his Arctic DX Blog.
Thank you to all the readers who took the time to listen to the SDR recordings in this comparision and register your opinions.
Guy Atkins is a Sr. Graphic Designer for T-Mobile and lives near Seattle, Washington. He’s a regular contributor to the SWLing Post.
Many thanks to SWLing Post contributor, Dan Robinson, who shares the following guest post:
ICOM’s IC-R8600: Can this mega-radio stay in the ring with big gun “legacy” receivers when it comes to shortwave band reception?
by Dan Robinson
When ICOM rolled out its new wideband receiver, the IC-R8600, I immediately took an interest in it. I have been primarily a hardcore DX’er and SWL and avoided purchasing wideband receivers, including the predecessor IC-R8500, because they were limited in areas such as selectivity.
My experience with ICOM includes owning a IC-R71A and R72, both of which I found to be strong performers, as well as a IC-R75. The R75 as everyone knows established a reputation as an excellent receiver that delivered bang for the buck, including for example 1hz readout and extreme stability.
In its design decisions with the 8600, ICOM clearly intended to hit it out of the park, taking a huge step from the 8500. That can be seen in the amazing color 4.3 inch LCD display with fairly fast spectrum scope and waterfall displays, coverage from 10 kHz to 3 gHz, decoding capability in multiple protocols, (Baudot RTTY, D-STAR, NXDN, dPMR, DCR (Digital Communication Radio) and APCO P25, and the combination of SDR and superheterodyne circuitry, with 2000 memories.
The new Icom IC-8600 at the 2017 Hamvention
At this point, there have been numerous reviews of the 8600, and videos are all over YouTube showing the basics of its operation and features. It has numerous flexibilities selected from the front panel and within the menu system. The ability to record directly to SDHC cards eliminates the need to attach an external solid state recorder (over the course of my DX career I accumulated many of these). I can’t say enough about this capability which automatically keeps fully labeled logs.
Other features include ICOM’s wonderful Twin Passband Tuning, combined with the ability to adjust filters 1/2/3, adjustable attenuation, Digital AFC, tone controls, noise blanker digital noise reduction, speech enunciator, main tuning dial tension adjustment, synchronous L/U/Double sideband, adjustable panel brightness . . . in short, just about everything one would think should be included in a 21st century receiver of this kind, ICOM put in the 8600. The firmware update released recently (1.30) added the capability to use the radio’s IQ output with HDSDR software, which means that the receiver is now not only a standalone but also functions easily with a PC.
Since the 8600 has been on the market for some time now, I discussed with Thomas Witherspoon of SWLing Post, the idea of obtaining an 8600 for the specific purpose of comparing it to some of the top receivers in my collection.
JRC NRD-515
At the current time, that list includes a JRC NRD-545, the Drake R-8 (original version purchased in 1993), JRC NRD-515, Watkins Johnson 8718A/MFP, Cubic R-2411, and a McKay Dymek DR-33C. All of the radios in my shack use a Wellbrook 1530 loop, fed through a RF Systems DA-8 Distributor/Amplifier which maintains signal levels from all outputs.
Watkins Johnson 8718A/MFP
A surprising outcome of my comparisons of the 8600 to these radios is that my appreciation of the qualities of these older receivers was actually re-ignited–so much so that some that had been on my ‘to sell’ list are now back in the ‘keepers’ column. This is not as much a criticism of the 8600, as it is a reaffirmation of the quality that was built in to some of the great receivers of yesteryear.
Because my collection actually extends across 2 or 3 rooms, moving the 8600 away from my central receiver “stack” was not possible, so testing comparisons were limited to the sets mentioned above. I would have liked to compare the 8600 with, for example, some classic tube receivers (HQ-180A, Eddystone 830/7), but they have been mostly inactive and located away from incoming antenna inputs.
Here in Potomac, MD outside of Washington, DC, the addition of the Wellbrook a few years ago, after years suffering with long wires, fundamentally changed a difficult situation. Signals were boosted, noise reduced. I wish things had continued this way. Unfortunately about a year ago, my area began to be plagued by a troubling ignition-type buzz, source unknown, targeting 11,500 to 12,100 khz though noticed elsewhere in the shortwave bands. It has continued, usually worse in summer than in winter.
I begin with this to underscore what I noticed as a high point for the 8600: its Noise Blanker and digital noise reduction are in my opinion quite effective, so much so that when properly adjusted, they can eliminate troublesome ignition-type noise. While NR is useful, as noted in other reviews it needs to be used carefully so as not to introduce too much digital suppression.
Here is an example of NB and NR in use against severe ignition-type noise at my location:
In August of 2017, I had my first experience tuning a 8600 at a DXpedition in Ohio.
So, I had a basic grasp of the various controls — the A/B/C knobs, and the menu system. When I received my review unit from ICOM last November, I was up and running quickly, but still puzzled over some aspects of the receiver’s operation.
Thanks to Dave Zantow who alerted me to a possible issue involving firmware 1.30 which appeared to introduce an increase in audio harshness (ICOM has been alerted to this). Dave also had suggestions (see his full review of the 8600 and other receivers on his site) about audio adjustment and speakers, and tweaking of the front display to make maximum use of the Peak and Waterfall settings. Dave emphasizes that careful adjustment is required of the 8600’s tone controls and AGC decay settings to get the most out of the receiver.
Because it is among the receivers in my shack in close proximity to the 8600, I chose to perform a number of tests comparing the ICOM to the Japan Radio Company NRD-545. As everyone knows, the 545 was the last in JRC’s prosumer line of receivers. It is feature-rich — JRC threw everything into this receiver. But one issue followed JRC receivers through the 5xxxx series — noisy audio. After finally acquiring a 545 some years ago (a high serial number unit formerly owned by the late Don Jensen) I jumped on that bandwagon of criticisms about the 545’s audio. However, in terms of sensitivity and numerous tools to hear and process signals, the receiver remains among my favorites, and this remains the case after my comparisons with the 8600.
When I compared signals heard by the 8600 with the 545, I found that while the JRC does have that ‘DSP’ sound, it was in many situations actually clearer than the ICOM. That was the case even when following advice on adjusting the 8600’s tone controls and AGC. The following two videos compare the 545 and 8600 on 5,905 khz and 17,655 khz. A third shows the receivers on 6,040 khz demonstrating effectiveness of their notch filtering capabilities:
My next comparison was the Drake R8. Little can be said about the Drake R8xxxx series of receivers that hasn’t been said. That superb Drake audio, established with the R8 and continued through the R8B, puts these receivers at the top of the heap and makes stations stand out. So, it’s little surprise then when compared to the 8600, which is an SDR in the HF range up to 30 mhz or so, the R8 still sounded superior on many, though not all, stations. Use of the SYNC mode (not adjustable on the original R8, but was on the R8A/B) also improves recoverable detail on the Drake.
The following video shows the 8600, 545 and finally the R8 on 5,995 khz (Mali), and the three receivers compared on 9,650 khz (Guinea), and a third comparing the 8600 with the full range of receivers in my main receiver stack, tuned to 9,415 khz which at the time was China Radio International.
Despite what some critics have said, I believe that the 8600’s synchronous detection modes are actually pretty good, helping with fading and stabilizing signals. I think the ICOM’s sync is certainly superior to what I experienced with the IC-R75. I would rate the SYNC on the AOR 7030+ superior to the 8600, with the NRD-545 a bit behind the 8600.
Acquired about 2 years ago, my AOR-7030+ is a late serial number version of this fantastic receiver. If I were to sell every radio in my shack but 5, the 7030 would not leave. Put simply, it is among the top shortwave receivers ever made, with off-the-charts audio, and if one has the rare NB7030 card, amazing notch and other capabilities. Comparing the 7030 to almost any other shortwave receiver ever made is like putting a Ferrari on the track with the competition. The audio, and reception tools are just that good.
At the same time, in the 8600 ICOM has produced a receiver that has as many of the essential tools required to manipulate and clarify signals as exist. The twin passband tuning continues to be superb. Being able to vary bandwidth in conjunction with the PBT, and do so even in SYNC mode, further enhances reception powers. Combine this with the ability to actually see signals on the 8600’s beautiful color LCD — we’re getting pretty close to the ultimate receiver (though I would love for someone to drop the successor to ICOM’s IC-R9500 on my front doorstep).
The following videos compare the 8600 to the same full range of receivers, ending with the Watkins Johnson 8718A/MFP, all tuned to 5,935 khz, followed by a comparison of receivers tuned to 5,000 khz
In the following videos, I compare the 8600 to other receivers 11,810 khz (BBC) which shows
the superb audio of the Drake R8xxxx series, yet the 8600 does quite well, and another video
compares the 8600 with the 545 and R8 tuned to 6,070 khz.
In the months that I have had the 8600, I did some comparisons with other receivers, among them my Watkins Johnson 8718A/MFP, which you saw in several videos. WJs prior to the 8711/HF-1000s were built like boat anchors and are QUIET. WJ, Cubic and similar sets manufactured for government and intelligence agencies, shared superb sensitivity, and most cases, excellent audio.
Comparisons of the 8600 on shortwave frequencies had the so-called Premium radios out front. The ICOM clearly shined when it comes to modern signal processing and adjustment tools such as PBT, Notch, and infinitely variable selectivity.
Summary
So, here’s a summary of my impressions after weeks of testing the ICOM IC-R8600 against some of the top gun receivers of yesteryear.
The 8600 scores a 10 on reception tools that are useful — though not crucial in these days of waning shortwave broadcasting activity — in producing and processing listenable audio: Twin PBT, Notch and Auto-Notch, Variable Bandwidths (though limited at the high end to 10 kHz), Pre-Amp and Attenuation, and that beautiful color LCD that allows one to see signals.
Predictably, the 8600 doesn’t blow away premium receivers that were manufactured to pick up the signal equivalent of butterflies and targeted government and spy agencies, and it also does not out-perform a range of other classic receivers whose reputations are well-established.
From a sensitivity and audio perspective, there is no real competition with the Drake R8, which time and time again excels in producing superior easy-to-listen audio. And the same holds for the AOR 7030+.
JRC’s NRD-515 more than holds its own and in many cases exceeds the 8600 in signal sensitivity, and producing listenable audio, despite its selectivity limitations.
The NRD-545 — maligned by critics for its DSP audio, often produced highly-listenable audio even in comparison with the 8600. The ICOM and the 545 share features that provide tremendous flexibility, the tools required to slice and dice signals. If the JRC NRDxxx receivers were the modern equivalent of such boat anchor classics as the Hammarlund HQ-180A, the 8600 is certainly at the top of the heap when it comes to having those same tools in a 21st century receiver.
Audio Samples
I performed some additional audio only tests between the 8600 and NRD-545 on several frequencies. In each, I carouseled from wide to narrow on the 8600, and did the same on the NRD-545. Here are the results:
You may have noticed that while on some examples the 8600 appears to sound better, the 545, with DSP technology born in the 1990’s is more than competitive with the ICOM.
Conclusion
In conclusion, with the 8600 we have a receiver that tunes up to 3 gHz, with highly flexible color scope, usable with HDSDR, with every tool imaginable for sifting through signals from 10 kHz up to 30 MHz, which is the area I have focused on for decades.
ICOM’s superb Twin PBT knocks out interference and narrows the heck out of any signal, with highly adjustable notch capabilities, customizable bandwidth functions, and what I consider to be highly effective noise blanking and noise reduction. Add to this 2,000 memory channels, multiple antenna inputs, adjustable attenuation and AGC and you have far more than what is needed given the current state of shortwave broadcasting.
Here’s the tough question: Would I recommend that a shortwave listener focused on what remains of listening in the SW bands purchase a 8600? Or to put it another way: Is the 8600 that much of a better radio in the SW spectrum? The answer has to be no.
Numerous receivers from the classics to even the latest portables with multiple selectivity flexibility (see the XHDATA D-808 or Eton Satellit) work for that. The used market overflows with superb HF communications receivers. Any of the Drake R8xxx series receivers, available on the used market for $400 to $1,000, now constitute overkill when it comes to reception in the MW to 30 mHz range.
But if you can project someday to having the time and patience to apply yourself to what is available above 30 MHz, and have the appropriate antenna(s) for those ranges, then by all means, the 8600 is the radio for you. It is the Babe Ruth’s bat of the receiver world — AND it has numerous flexible tools (though one wishes that ICOM had included DRM capability).
As I finalized this review, I continued to wrestle with the decision of purchasing the 8600 that was so generously provided by ICOM. You won’t read here what my final decision was–but anyone who is interested can contact me in coming days and weeks to learn the answer.
Last minute update Just before this review went to press, I discovered an issue of concern: when the 8600 was left on overnight, or for any period of multiple hours, upon awakening from “sleep” (screen off) mode, nothing but distortion is heard from the speaker. The only solution was to perform a POWER OFF/POWER ON, after which normal audio was heard. This issue was I brought to the attention of ICOM.
I want to thank Ray Novak and Faheem Hussain of ICOM for providing the 8600 used in this comparison, and for their patience as I encountered several delays completing my review and getting to print. And thanks to Thomas Witherspoon without whose initial encouragement, this review would not have been possible.
Dan, thank you for an amazing IC-R8600 review and comparison with your benchmark commercial grade receivers! Thanks for taking the time to make thorough comparison video and audio recordings. Your guest posts are always most welcome on the SWLing Post!
Many thanks to SWLing Post contributor, Ivan Cholakov, who shares the following video where he compares the SDRplay RSP1A and the AirSpy HF+ software defined radios on shortwave and mediumwave:
After SWling Post contributor, Guy Atkins, posted the survey results of his excellent Elad FDM-S2 vs AirSpy HF+ weak signal comparison, I received a few questions about the AirSpy HF+ “R3 Bypass” modification Guy mentioned in his post.
Guy has not yet performed the modification on his HF+–neither have I–but he points out that others have noted it: “significantly boosts sensitivity of the HF+ from longwave up to about 15 MHz, without any noted overload issues.”
I reached out to AirSpy president, Youssef Touil, for a little more insight about this modification. Youssef replied:
During the early phases of the design R3 was a place holder for a 0 ohms resistor that allows experimenters to customize the input impedance. For example:
A 300 pF capacitor will naturally filter the LW/MW bands for better performance in the HAM bands
A 10µH inductor would allow the use of electrically short antennas (E-Field probes) for MW and LW
A short (or high value capacitor) would get you the nominal 50 ohms impedance over the entire band, but then it’s the responsibility of the user to make sure his antenna has the right gain at the right band
A custom filter can also be inserted between the SMA and the tuner block if so desired.
Click to enlarge. (Photo source: RTL-S1DR.com)
R3 and the nearby resistors have been intentionally left outside of the RF shield, and their size was picked to be big enough to allow anyone to play with them. You will notice the size difference with the rest of the components.
In general, unless one knows what he’s doing, it’s not recommended to alter a working system. “If it’s working, don’t fix it”. But, we are hobbyists, and not doing so leaves an uncomfortable feeling of something unachieved. Most brands addressing the hobby market leave some tweaks and even label them in the PCB.
The main purpose of the HF+ is the best possible performance on HF at an affordable price. This is to incite HAMs to get started with this wonderful technology while using an SDR that isn’t worse than their existing analog rig.
The MW/LW/VLF crowd may have slightly different requirements, but that can be addressed by shorting a resistor.
Regards,
Youssef Touil
Thank you, Youssef, for replying to my inquiry so quickly and thoroughly.
No doubt, I too will eventually modify R3–it’s very difficult not to experiment, especially when a product was designed with the experimenter in mind.
I really feel like AirSpy has knocked it out of the ballpark with the HF+. For those of us primarily concerned with HF performance, this SDR is very hard to beat–especially at its $199 price point!
The first is what looks like a scanner behind Terry Jeffords, then an unidentified radio in the book case behind Captain Ray Holt, and finally what I think is a AOR 8600 on the table next to Amy Santiago.
Many thanks, Mark! You have very sharp eyes–especially spotting the AOR on the table in the last scene!
Please comment if you can identify this radio gear!

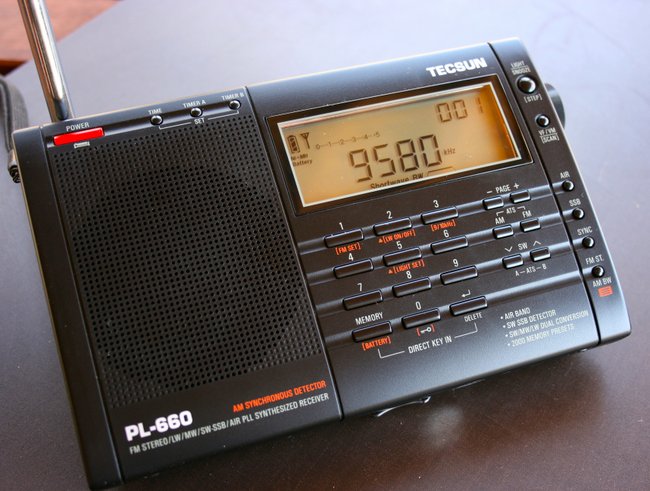

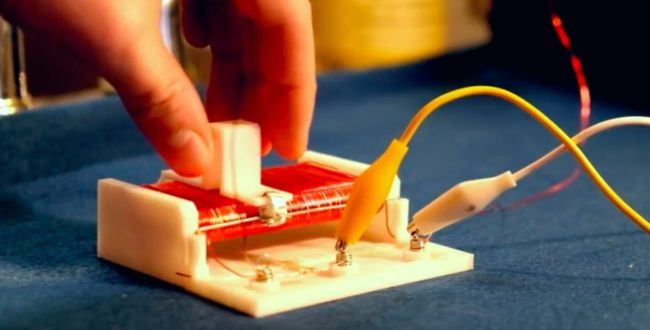

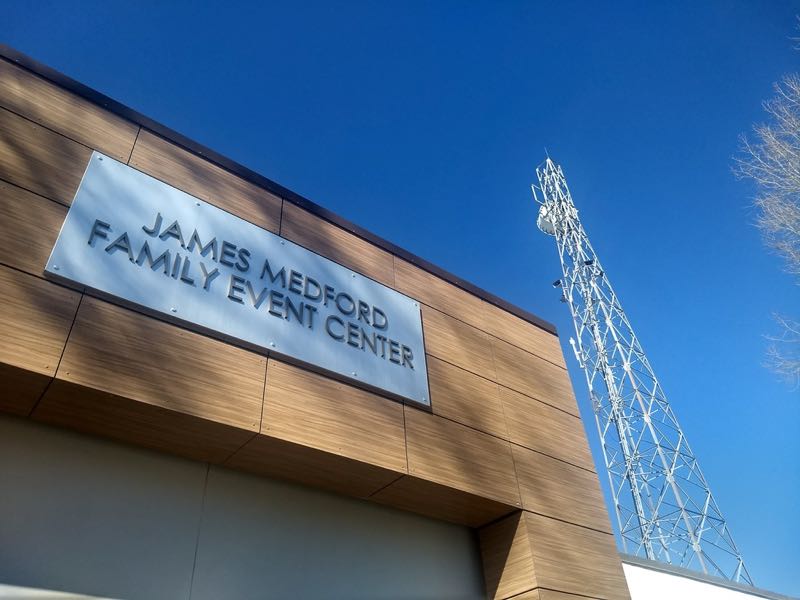


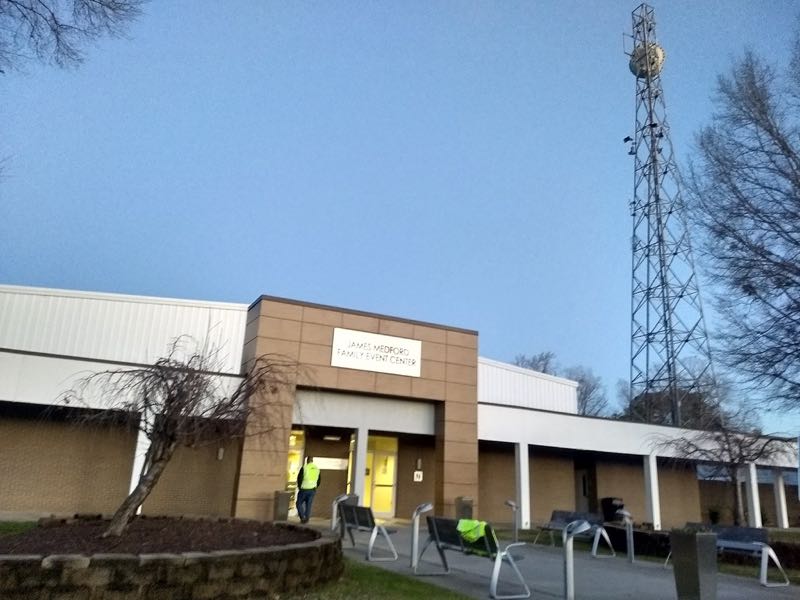


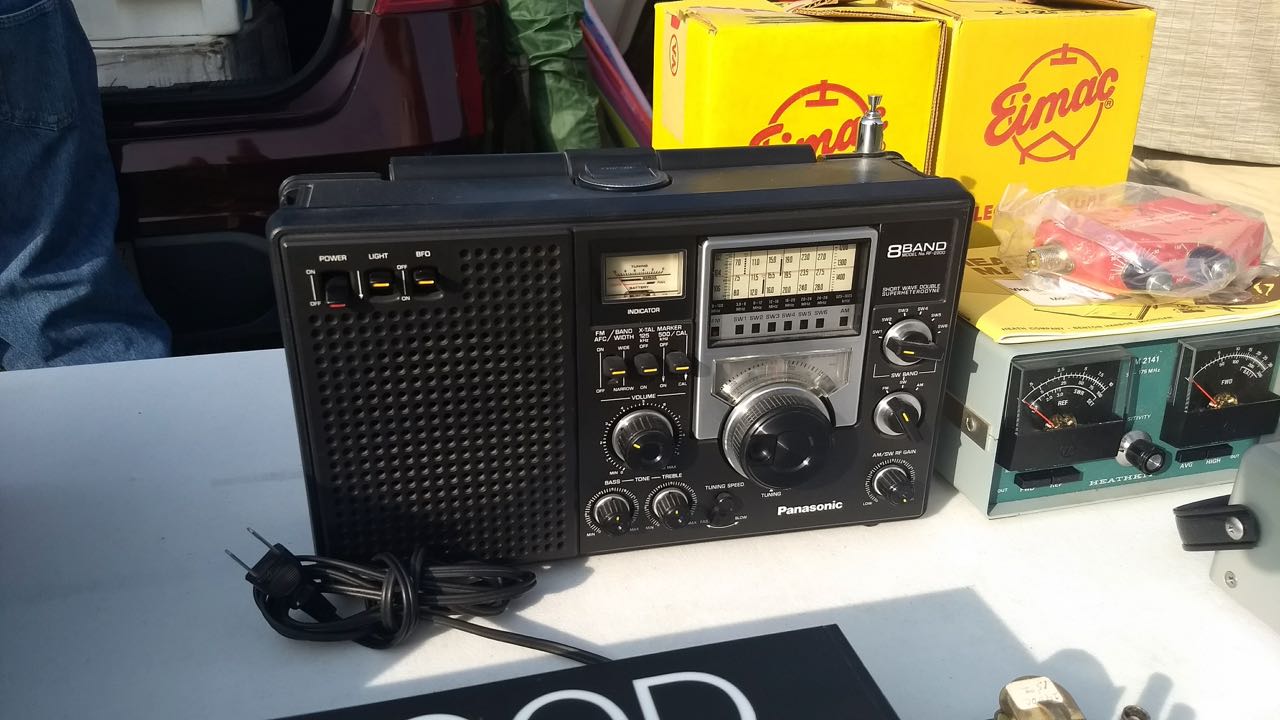
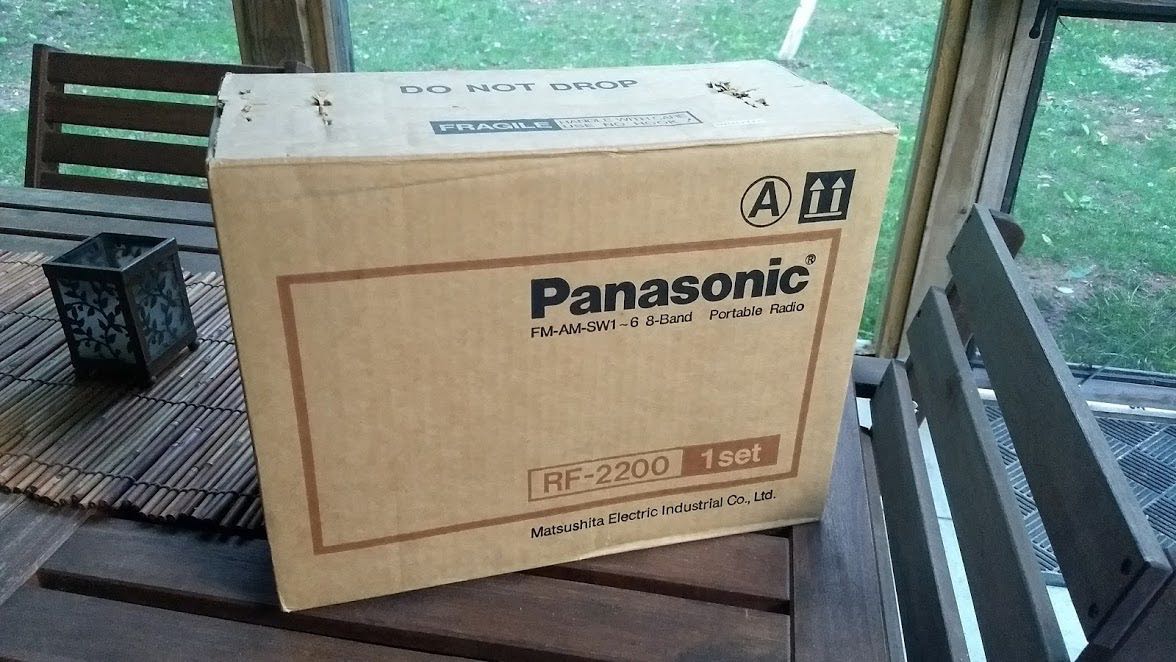
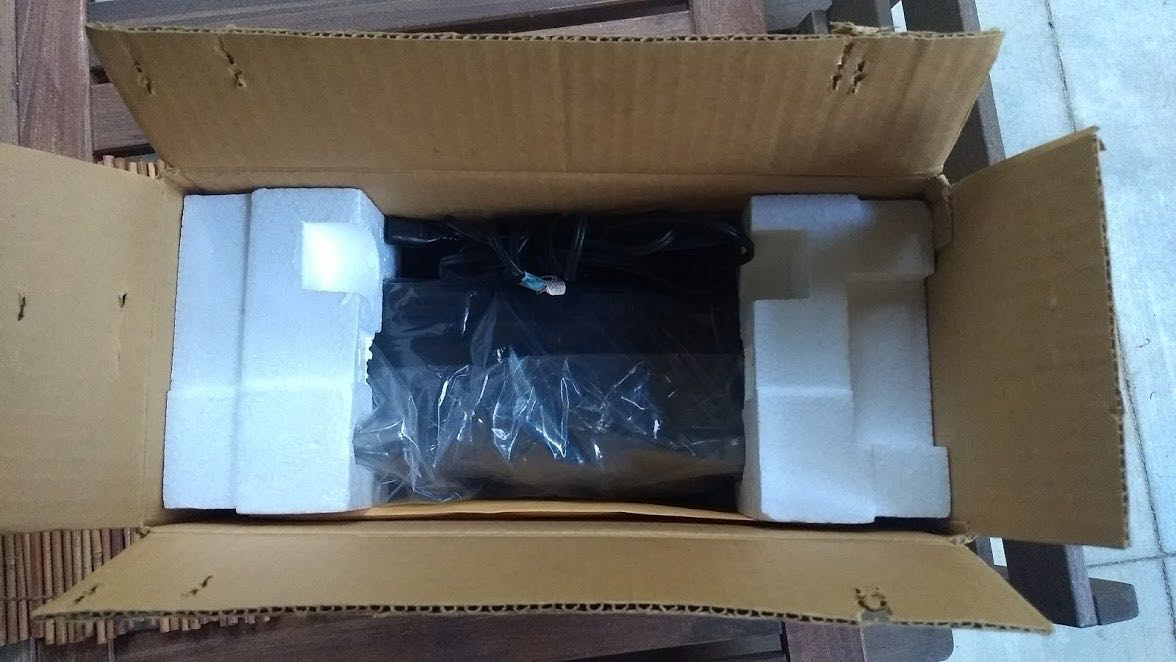
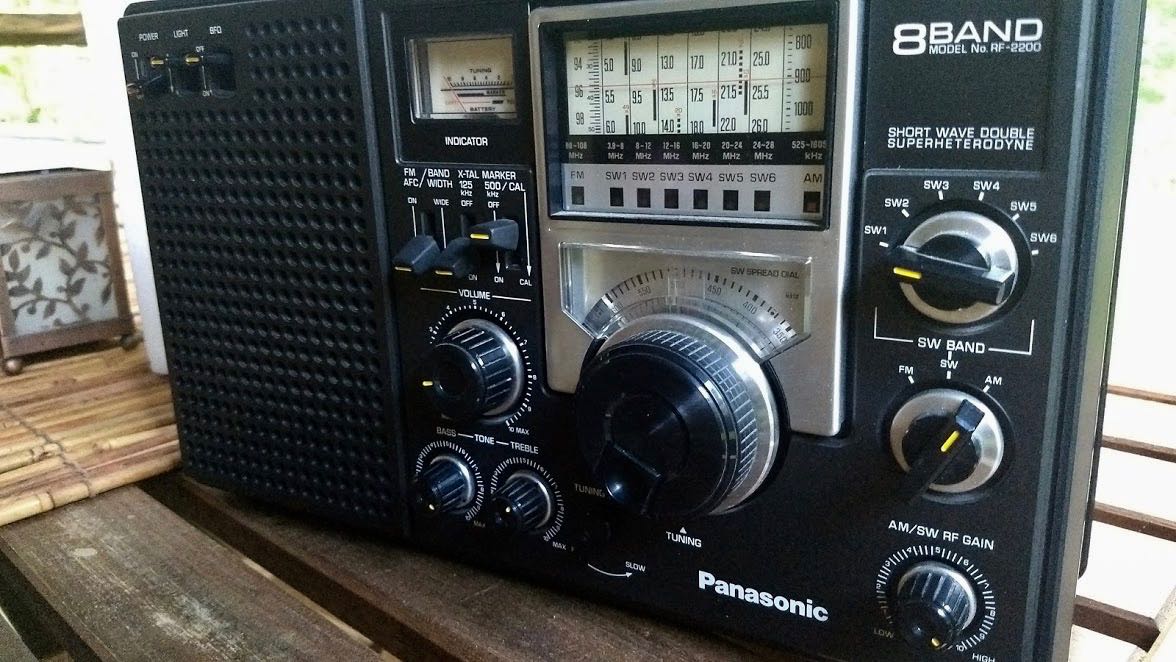
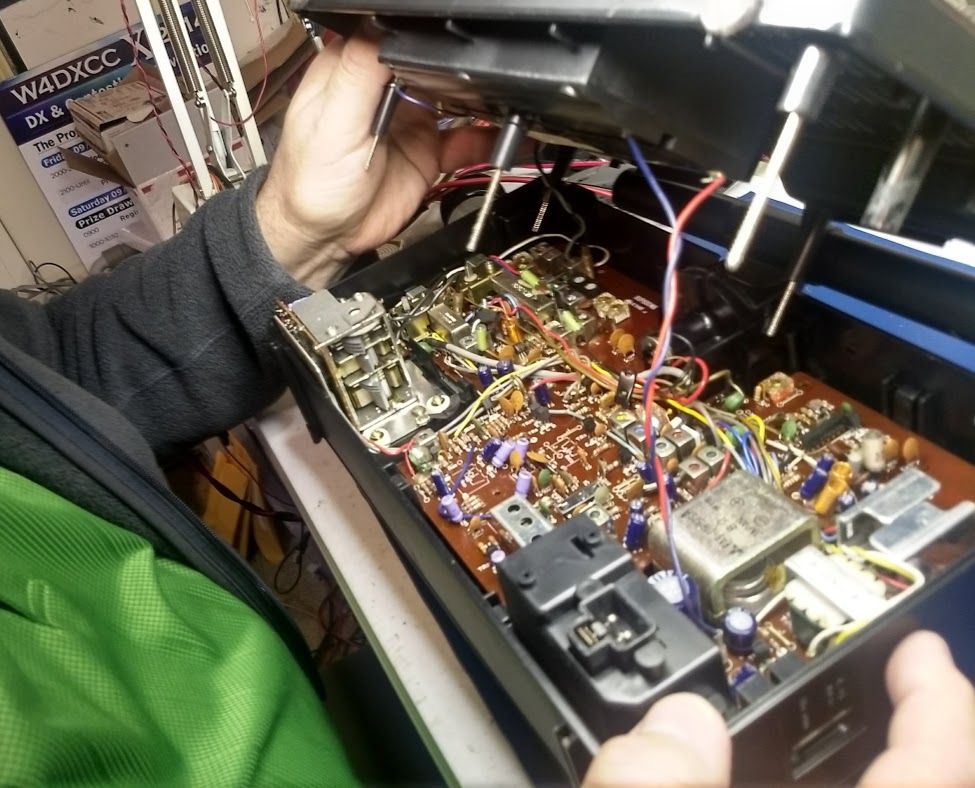
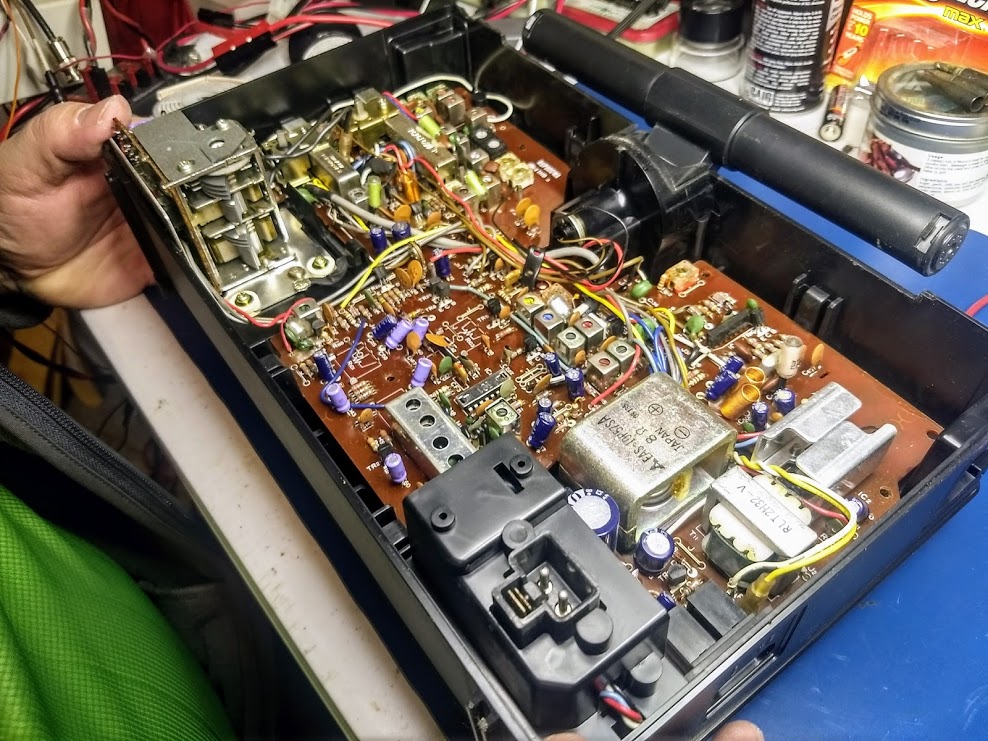
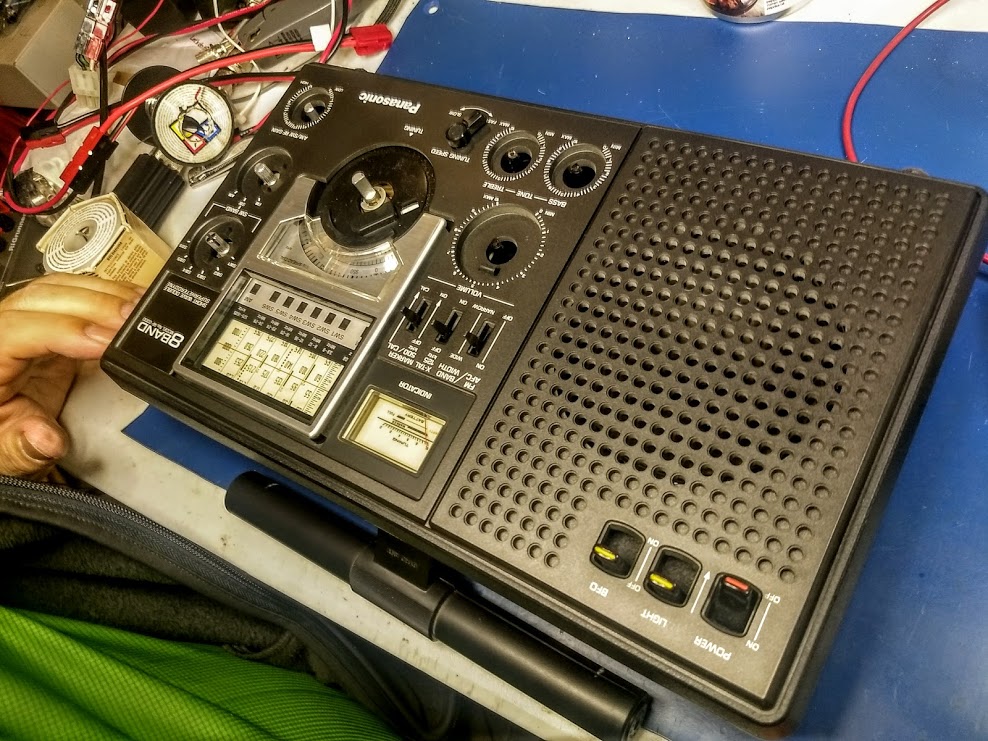
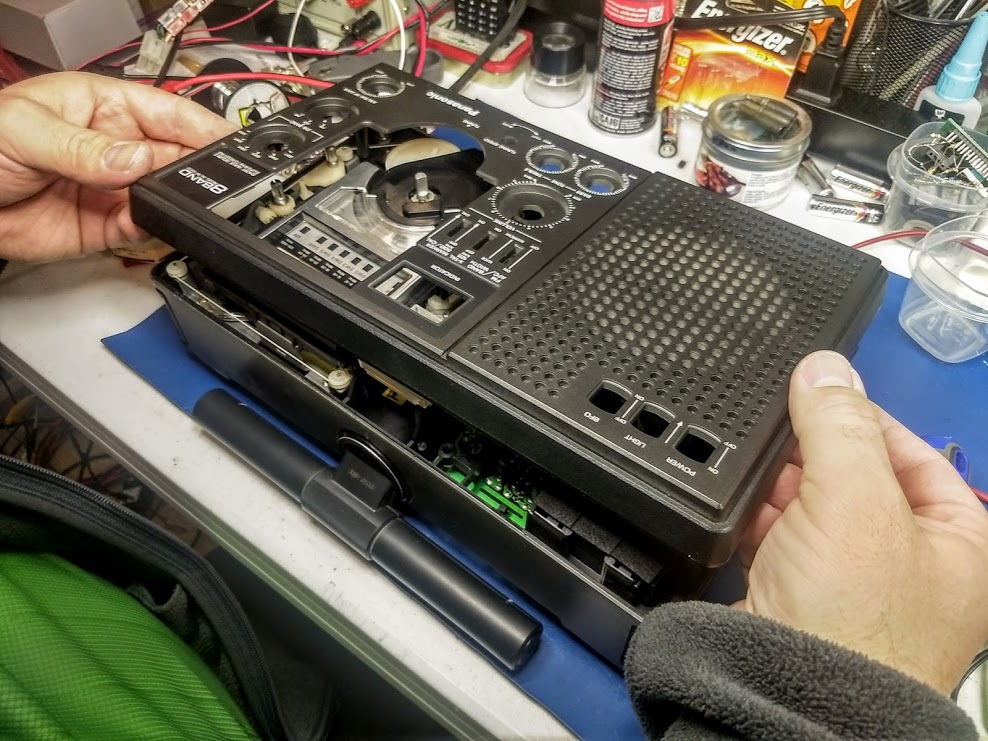
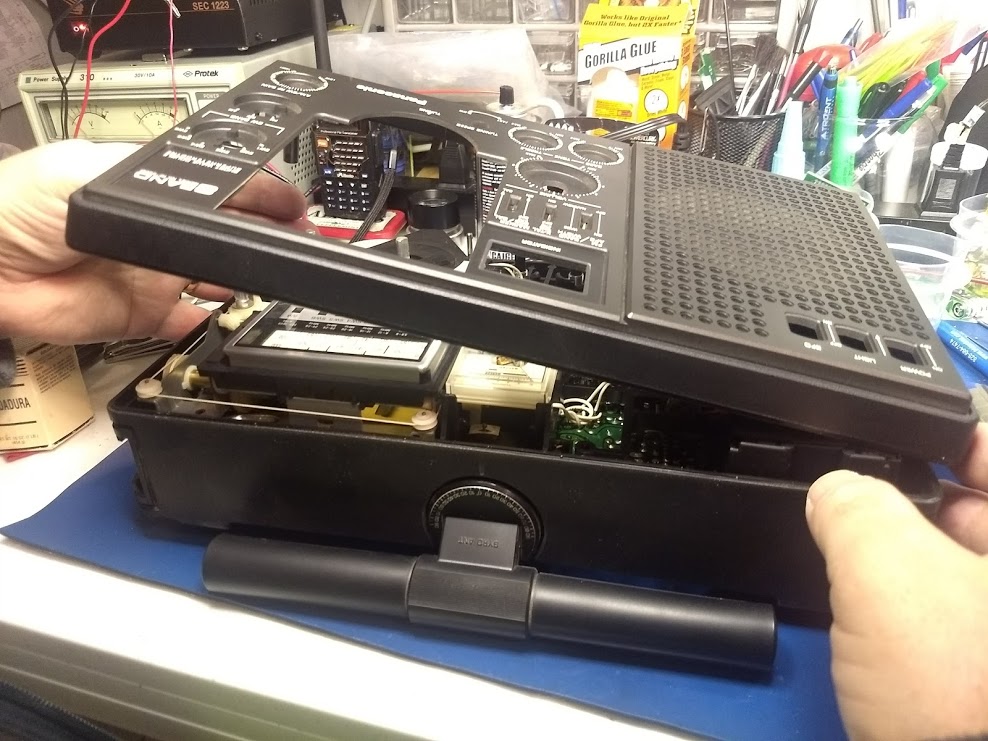

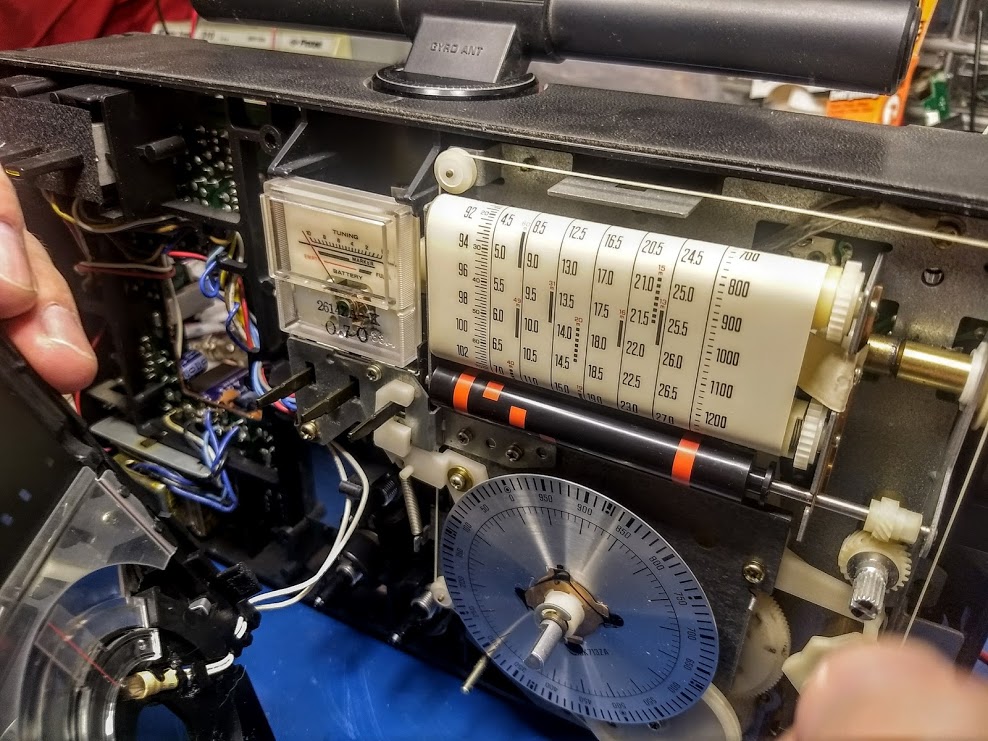
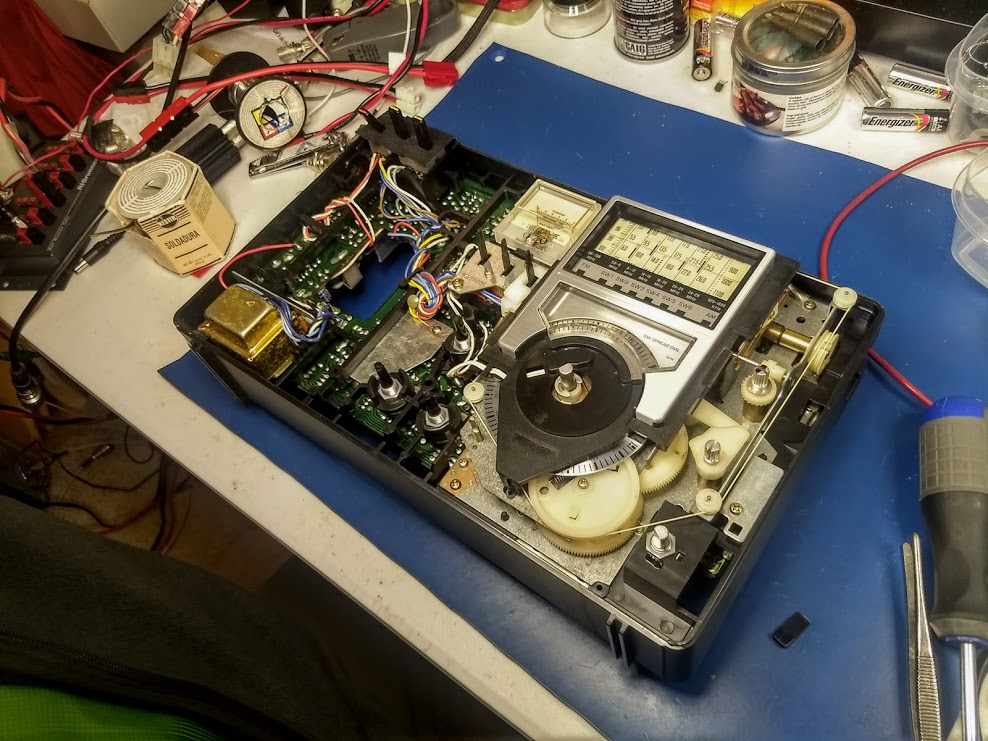
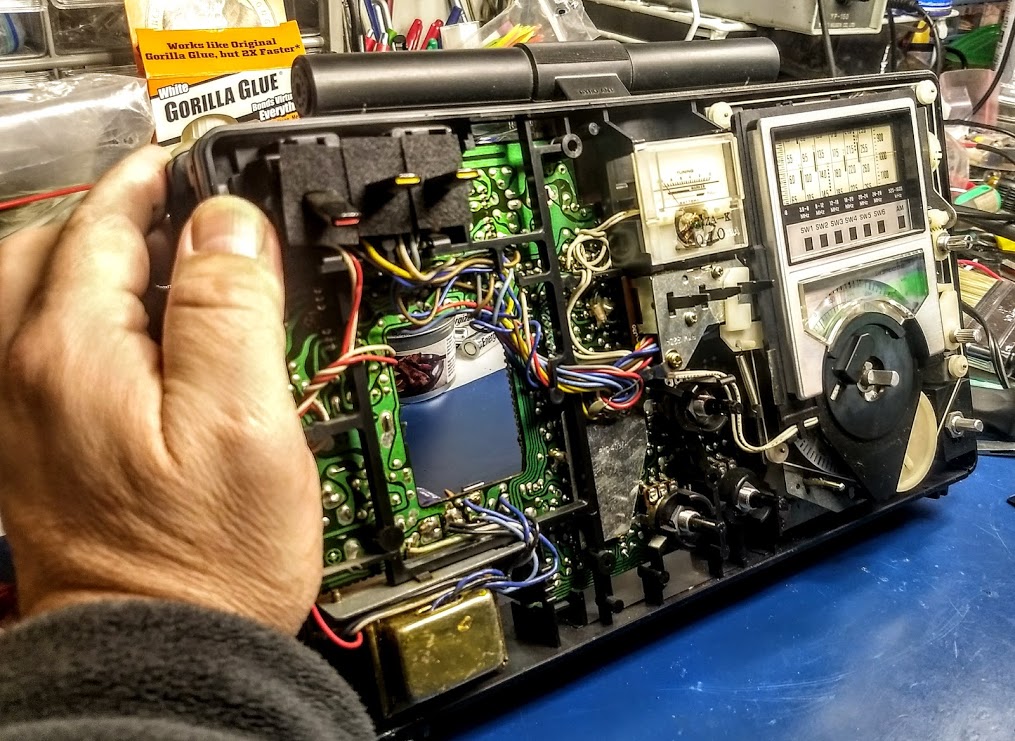
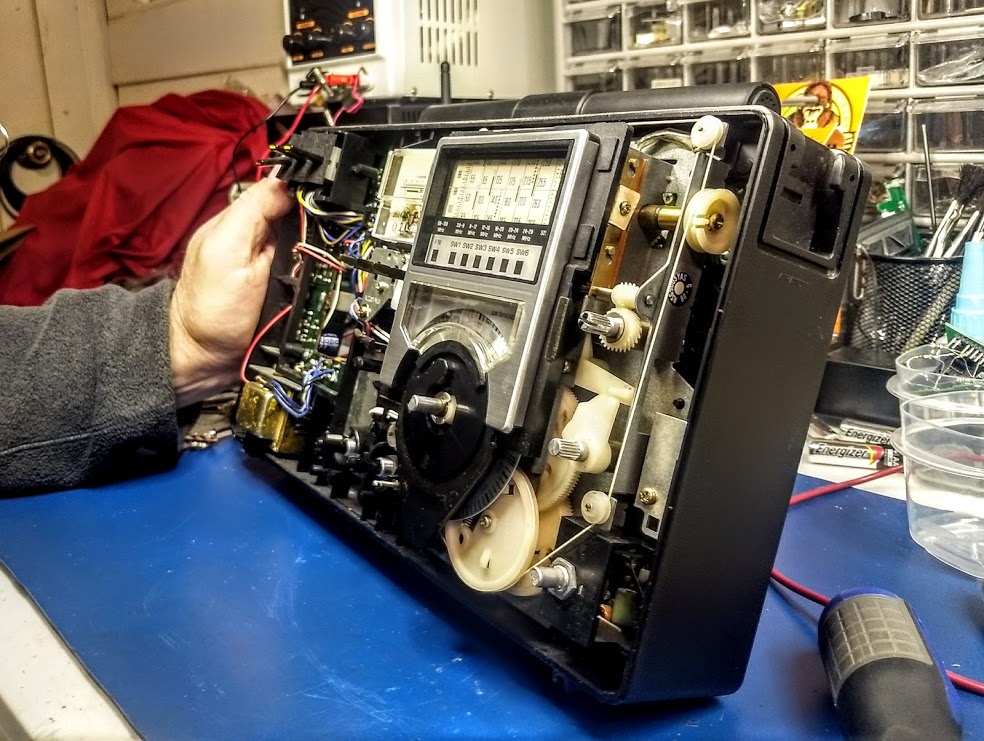


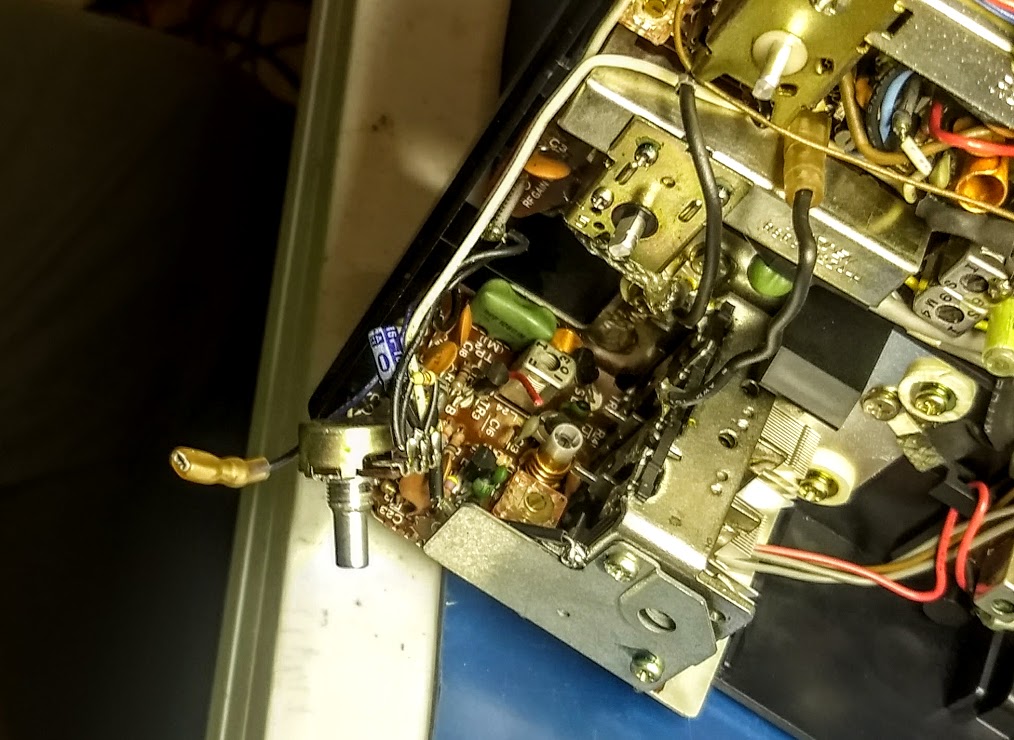
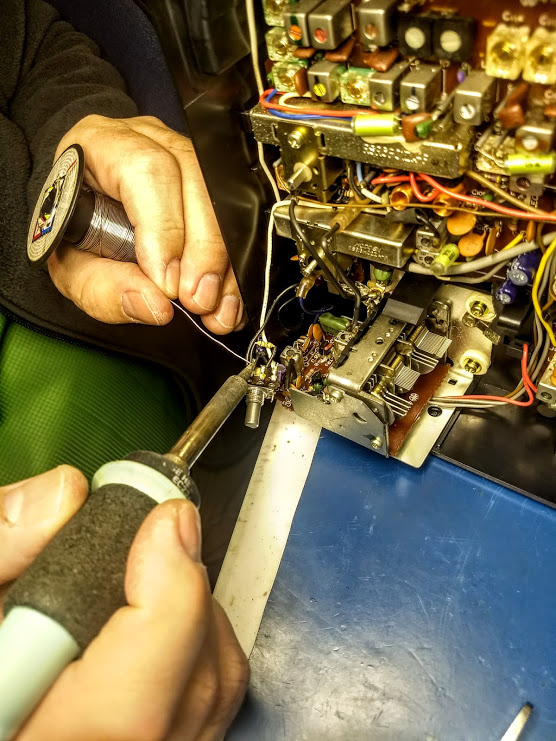


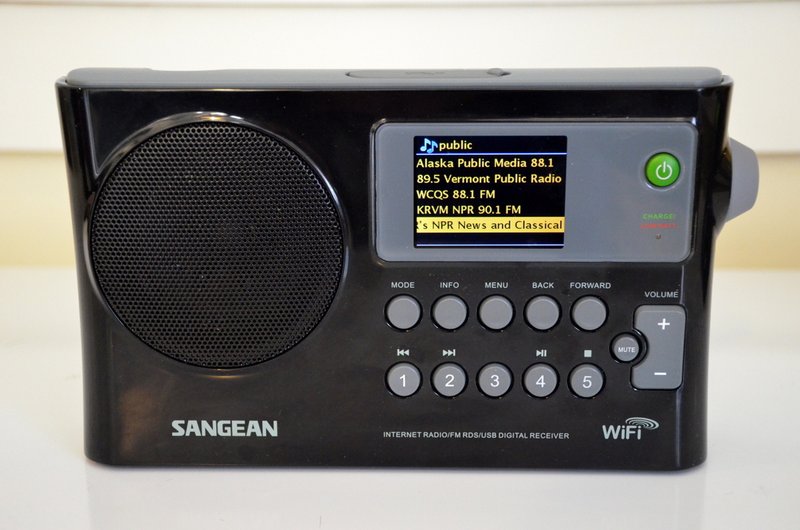
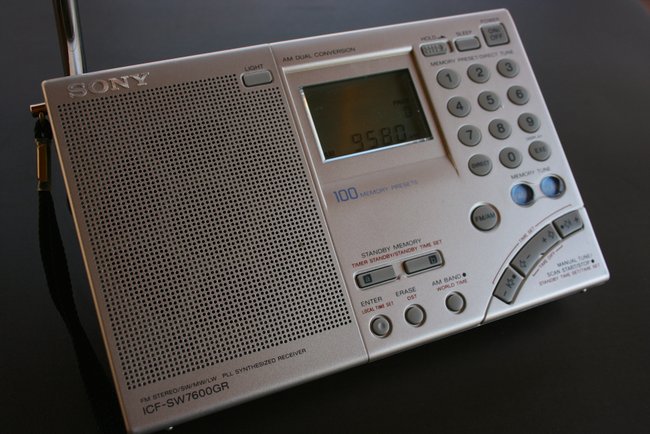


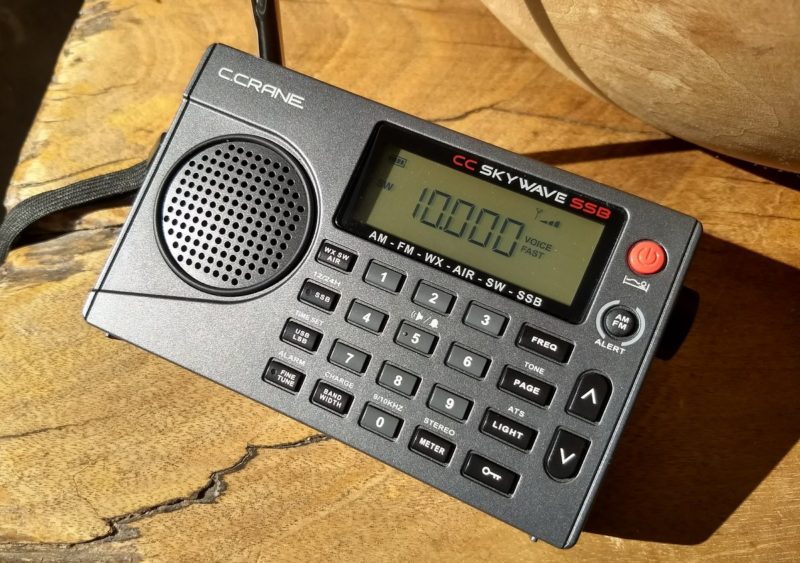


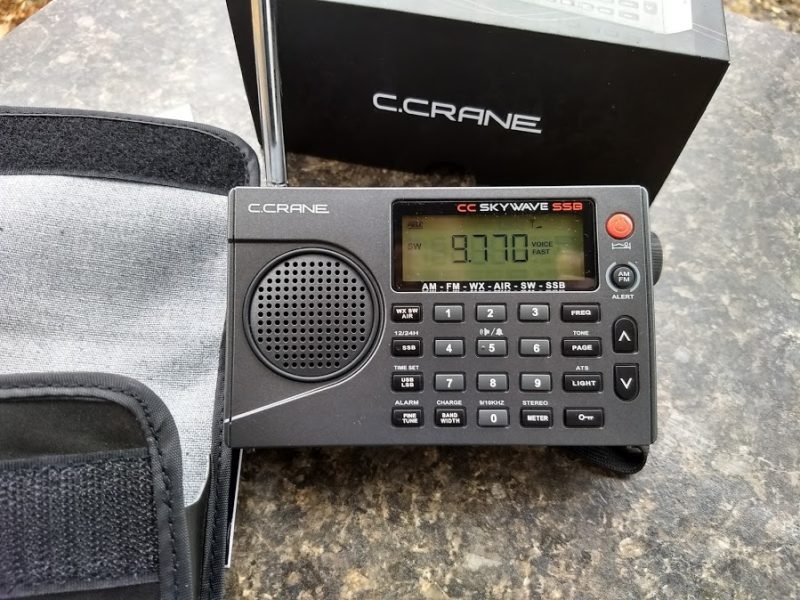
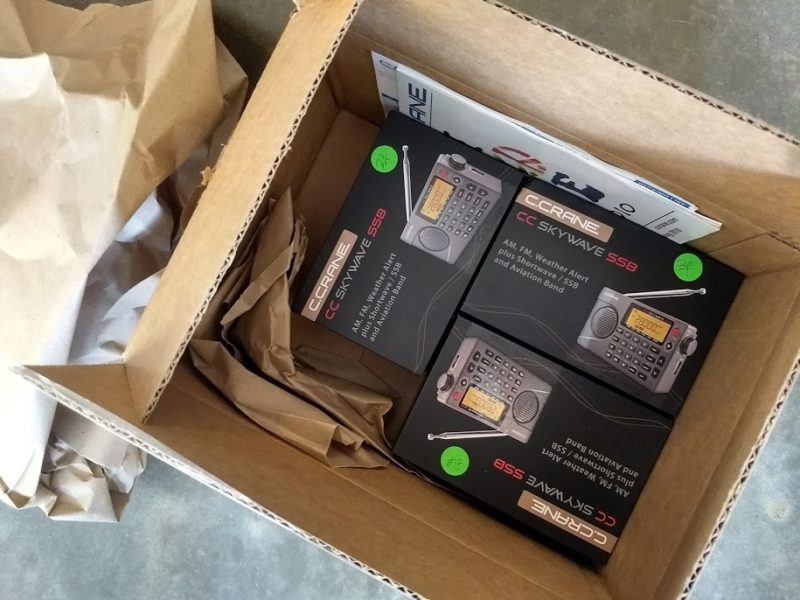


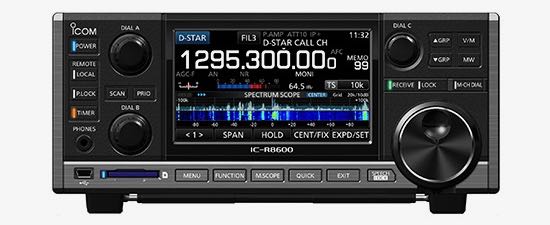
 , NXDN